Blog

  • Mix baking soda with honey

    Mix baking soda with honey

    Did you ever wonder why grandmothers seem to have a remedy for everything? My grandmother always swore by a simple yet powerful mixture—baking soda and honey. Whether for skin care, health remedies, or even household cleaning, this combination was her go-to solution. Let’s dive into the magic of baking soda and honey and explore how she used it in her everyday life.

    The Secret of Baking Soda and Honey

    What Makes Baking Soda Special?

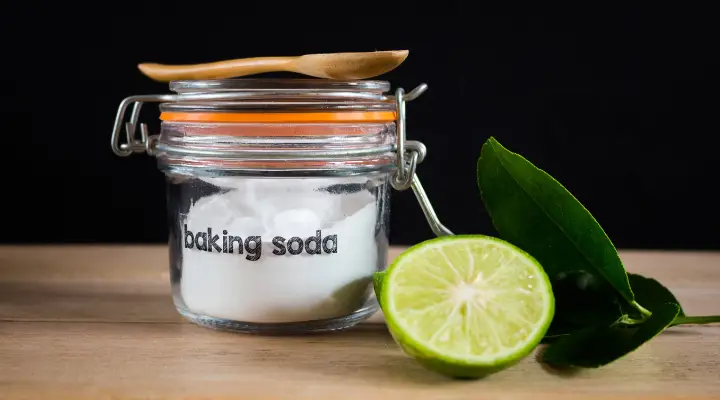
    Baking soda, or sodium bicarbonate, is a natural compound with a variety of uses. It helps neutralize acids, acts as a gentle exfoliant, and even has antimicrobial properties. Because of its alkaline nature, it can help balance the body’s pH levels, making it a valuable ingredient in both health and beauty treatments.

    The Benefits of Honey

    Honey is nature’s liquid gold. Packed with antioxidants, antibacterial properties, and nutrients, it has been used for centuries in medicine and beauty. Honey soothes sore throats, aids digestion, and keeps skin hydrated and youthful.

    Traditional Uses of Baking Soda and Honey

    A Natural Remedy for Skin Care

    My grandmother often made a face mask using baking soda and honey to exfoliate and cleanse her skin. The gentle scrub removed dead skin cells while honey moisturized and nourished her face.

    A Powerful Antiseptic for Wounds

    She also applied a paste of baking soda and honey to small cuts and burns. The antiseptic properties of both ingredients helped to prevent infections and speed up healing.

    A Soothing Cough Syrup Alternative

    Whenever I had a cough, she would mix honey and a pinch of baking soda into warm water. It acted as a soothing remedy, helping to clear my throat and reduce irritation.

    Health Benefits of Baking Soda and Honey

    A Natural Digestive Aid

    One of my grandmother’s favorite tricks was mixing a little baking soda with honey in water to relieve indigestion and bloating.

    Balancing pH Levels in the Body

    Baking soda helps neutralize excessive acidity in the body, which can prevent acid reflux and other digestive issues.

    Potential Cancer-Fighting Properties

    Some studies suggest that the combination of honey and baking soda could have anti-cancer properties by creating an environment unfavorable to cancer cells.

    How to Prepare and Use the Mixture

    Simple DIY Recipe

    1. Mix one teaspoon of baking soda with three tablespoons of honey.
    2. Stir until smooth.
    3. Use as needed for various applications.

    How Often to Use It

    • For skin: Use 2-3 times per week.
    • For digestion: Take once daily if needed.
    • For wounds: Apply as required.

    Baking Soda and Honey for Beauty

    Exfoliating Face Mask

    Gently rub the mixture onto your skin, leave it for 10 minutes, then rinse.

    Natural Teeth Whitener

    A tiny amount can be used as a mild, chemical-free toothpaste.

    Acne Treatment

    Apply directly to blemishes to reduce inflammation and kill bacteria.

    Household Uses of This Mixture

    Cleaning and Disinfecting

    This mixture makes an excellent natural cleaner for surfaces and kitchen counters.

    Removing Odors

    A small amount placed in a dish can absorb bad smells.

    Natural Insect Repellent

    The antibacterial properties help keep bugs at bay.

    Warnings and Precautions

    • Do not overuse baking soda internally, as it can affect stomach acidity.
    • Always do a patch test before using it on the skin.
    • Consult a doctor before using it as a remedy for serious health conditions.

    Conclusion

    My grandmother’s wisdom has stood the test of time. Baking soda and honey together create a powerhouse of benefits for health, beauty, and even household use. This simple yet effective combination is something everyone should consider incorporating into their daily lives.

  • Why You Extend Your Foot Out of the Bed at Nigh

    Why You Extend Your Foot Out of the Bed at Nigh

    Sleeping is a vital part of our lives, yet many of us unconsciously develop unique habits during sleep. One intriguing behavior is extending a foot out of the bed during the night. This seemingly small action is more common than you might think and has fascinating implications for our comfort, temperature regulation, and overall sleep quality. In this article, we explore the science, psychology, and benefits behind this habit in detail.

    The Science of Body Temperature Regulation During Sleep

    Our bodies have an intricate mechanism for maintaining optimal temperature, known as thermoregulation. When we sleep, our core body temperature naturally drops by about 1-2 degrees Fahrenheit. This cooling process is essential for initiating and sustaining deep, restorative sleep.

    Feet play a critical role in thermoregulation because they are highly vascularized and lack hair, making them efficient for heat exchange. By sticking one foot out of the blanket, you allow excess heat to escape, helping your body maintain a balanced temperature. This small adjustment can provide immediate relief if your environment becomes too warm, promoting uninterrupted sleep cycles.

    Pages: 1 2 3 4

  • Mix dishwashing liquid with toothpaste! You won’t believe what will happeN

    Mix dishwashing liquid with toothpaste! You won’t believe what will happeN

    In the realm of household hacks and unusual combinations, the idea of mixing dishwashing liquid with toothpaste has stirred curiosity and speculation. While it may sound unconventional, this peculiar combination has prompted countless individuals to experiment, yielding surprising results. This article explores the potential uses, benefits, and risks of this mixture, debunking myths and shedding light on whether this viral trend holds any merit.


    What Happens When Dishwashing Liquid and Toothpaste are Mixed?

    Combining dishwashing liquid and toothpaste results in a chemical reaction due to the differing ingredients in these products. Dishwashing liquid contains surfactants designed to break down grease, while toothpaste includes abrasives and fluoride to clean and protect teeth. When mixed, the interaction can create an unexpected foaming effect, which has led to various claims about its utility in cleaning and household applications.

    Key Reactions to Note:

    1. Foaming Action: The surfactants and abrasives combine to create an enhanced foaming effect.
    2. Degreasing Power: The combination may amplify the degreasing capability of dishwashing liquid.
    3. Abrasive Cleaning: Toothpaste’s micro-abrasives may enhance cleaning on stubborn surfaces.

    Uses of Mixing Dishwashing Liquid and Toothpaste

    1. Cleaning Tough Surfaces

    Some claim that the mixture is effective for cleaning greasy stovetops, kitchen counters, and bathroom tiles. The grease-cutting ability of dishwashing liquid, combined with the abrasiveness of toothpaste, can tackle stubborn stains and grime.

    How to Use:

    • Mix equal parts of toothpaste and dishwashing liquid in a small container.
    • Apply the mixture to the surface with a sponge or brush.
    • Scrub gently, then rinse thoroughly with water.

    2. Polishing Metal Surfaces

    This mixture can be used to restore the shine of metal items such as silverware, faucets, and jewelry. Toothpaste is known for its mild abrasiveness, which can polish metal surfaces without causing damage.

    Steps for Polishing:

    1. Apply a small amount of the mixture to the metal surface.
    2. Use a soft cloth or toothbrush to buff in circular motions.
    3. Use a microfiber towel to pat dry after rinsing with warm water.

    3. Tackling Stubborn Stains on Clothes

    The mixture is rumored to work as a pre-treatment for fabric stains, particularly on grease or oil spots.

    Usage Directions:

    • Apply a small amount of the mixture directly to the stain.
    • Let it sit for 5–10 minutes.
    • Wash the garment as usual in warm water.

    Potential Risks and Precautions

    While the combination may offer cleaning benefits, there are several precautions to keep in mind:

    1. Skin Irritation: Dishwashing liquid contains chemicals that can irritate the skin when mixed with toothpaste. Always wear gloves.
    2. Damage to Surfaces: Avoid using this mixture on delicate or porous surfaces, such as marble or wood, as it may cause etching or discoloration.
    3. Not for Oral Use: This mixture is strictly for cleaning purposes and should never be ingested or used as a substitute for toothpaste.

    Myths Surrounding This Viral Trend

    There are several misconceptions about mixing dishwashing liquid with toothpaste. Here, we address the most common ones:

    1. Whitening Teeth

    False: Some believe this mixture can be used as a DIY teeth-whitening hack. However, the harsh chemicals in dishwashing liquid are not safe for oral use and may cause severe irritation or toxicity.

    2. Removing Rust

    Partially True: While the mixture may help loosen surface rust, it is not as effective as dedicated rust-removal products.

    3. All-Purpose Cleaner

    True with Limitations: The combination is versatile but should be used cautiously to avoid damaging certain materials.


    Safe Alternatives to Experiment With

    If the idea of mixing dishwashing liquid and toothpaste feels too risky, consider these safer alternatives:

    • Baking Soda and Vinegar: A classic combination for cleaning and deodorizing.
    • Lemon and Salt: Effective for polishing metals and removing stains.
    • Toothpaste Alone: Use a non-gel toothpaste for minor cleaning tasks like polishing jewelry.

    Conclusion: The Verdict on Dishwashing Liquid and Toothpaste

    Mixing dishwashing liquid with toothpaste is a novel concept that has captured the imagination of DIY enthusiasts and cleaners alike. While the combination can provide cleaning benefits in certain scenarios, it is essential to approach this trend with caution and awareness of potential risks. For best results, always test the mixture on a small area before applying it widely, and never use it for anything other than cleaning.

  • Salt under the bed solves a problem that many of us have in our homeS

    Salt under the bed solves a problem that many of us have in our homeS

    Salt is one of the most ubiquitous items in our homes. However, its uses extend far bEyond the kitchen. Placing salt under the bed has gained attention for its remarkable ability to solve a variety of problems faced by many households. This seemingly simple practice carries ancient wisdom and practical benefits that can transform the ambiance and functionality of your home. In this article, we delve into why salt under the bed is an effective solution and explore its many applications.


    The Mystical and Scientific Significance of Salt

    Salt has been revered for centuries as a symbol of purity and protection. In traditional practices, salt is believed to have the power to ward off negative energy, creating a harmonious and balanced environment. Modern science supports this view, recognizing salt as a natural absorber of moisture, odors, and impurities. These properties make it a versatile tool for addressing several common household issues.


    How Salt Under the Bed Promotes Better Sleep

    Absorbing Excess Moisture

    One of the primary benefits of placing salt under the bed is its ability to absorb moisture from the air. In humid environments, excessive moisture can lead to discomfort, mold growth, and a musty odor in bedrooms. Salt, with its hygroscopic properties, acts as a natural dehumidifier, maintaining optimal air quality for restful sleep.

    Reducing Allergens

    Dust mites and allergens thrive in damp conditions. By reducing moisture levels, salt under the bed creates an environment that is less hospitable to these irritants. This can significantly improve sleep quality, especially for individuals with allergies or respiratory issues.

    Balancing Energy

    In feng shui and other spiritual practices, salt is used to cleanse negative energy. Placing a bowl of salt under the bed is believed to purify the surrounding energy, fostering a serene and calming atmosphere conducive to peaceful sleep.


    Salt as a Remedy for Household Odors

    Neutralizing Odors

    Salt is highly effective at neutralizing unpleasant odors. If your bedroom is plagued by persistent smells, a small bowl of salt placed under the bed can help. Salt absorbs odor-causing particles from the air, leaving the room fresh and inviting.

    Combining Salt with Essential Oils

    For an enhanced effect, mix a few drops of your favorite essential oil with the salt. This not only neutralizes odors but also introduces a pleasant fragrance, further improving the room’s ambiance.


    Protecting Against Pests

    Deterring Insects

    Salt is a natural deterrent for many common household pests, including ants and spiders. Placing salt under the bed creates a barrier that these insects are unlikely to cross, ensuring a pest-free sleeping area.

    Preventing Mold and Mildew

    By absorbing moisture, salt helps prevent the growth of mold and mildew under the bed—a common issue in poorly ventilated bedrooms. This guarantees a healthier and cleaner living space.

    Salt as a Tool for Stress Relief and Mental Clarity

    Creating a Calming Environment

    A restful environment is crucial for stress relief and mental clarity. Salt’s ability to cleanse negative energy and promote positivity can significantly enhance the overall atmosphere of your bedroom, making it a sanctuary for relaxation.

    Combining Salt with Crystals

    For added benefits, consider combining salt with calming crystals like amethyst or quartz. This combination is believed to amplify the cleansing and energy-balancing effects of salt, further supporting mental clarity and emotional well-being.

    Practical Tips for Using Salt Under the Bed

    Choosing the Right Salt

    While table salt is effective, coarse sea salt or Himalayan pink salt is preferred for its larger surface area and mineral content. These types of salt not only absorb moisture more efficiently but also provide additional aesthetic and energetic benefits.

    Placement and Replacement

    • Use a small bowl or container to hold the salt.
    • Place it strategically under the bed, focusing on areas prone to moisture or odors.
    • Replace the salt every two to four weeks to maintain its effectiveness. Dispose of the used salt outside the home, as it may have absorbed negative energy and impurities.

    Alternative Uses of Salt in the Bedroom

    Under-Bed Storage Freshener

    If you use under-bed storage, placing a sachet of salt inside can help keep stored items fresh and free from odors or moisture damage.

    DIY Air Purifier

    Create a simple air purifier by combining salt with activated charcoal. Place the mixture under your bed or around the room for enhanced air quality.

    Is Salt Under the Bed Right for You?

    This simple and affordable practice can have a profound impact on your home. Whether you’re seeking better sleep, cleaner air, or a more harmonious environment, salt under the bed offers an effective solution backed by both traditional wisdom and scientific principles.

  • Discover the trick of shaving foam in the kitchen – the result is magical!

    Discover the trick of shaving foam in the kitchen – the result is magical!

    Shaving foam might seem like an unlikely tool to use in the kitchen, but its applications are nothing short of extraordinary. This everyday household item, traditionally confined to the bathroom, can provide a host of benefits when utilized creatively in your culinary space. From cleaning hacks to innovative uses, discover how shaving foam can transform your kitchen experience.


    What Is Shaving Foam and Why Is It Effective?

    Shaving foam is a light, airy substance designed to soften hair and provide lubrication for shaving. Its unique texture and chemical composition make it ideal for tasks that require a gentle yet effective cleaning agent. With surfactants and moisturizers, it serves as a versatile tool for various purposes beyond personal grooming.


    Cleaning Your Stainless-Steel Surfaces to Perfection

    Stainless steel appliances add sophistication to your kitchen, but they are prone to fingerprints, smudges, and water stains. Shaving foam offers an unexpected solution to keep them spotless.

    1. Apply the Shaving Foam
      Spread a generous layer of shaving foam on the affected area of your appliance using a clean, soft cloth.
    2. Buff Gently
      Use circular motions to work the foam into the surface, lifting dirt and grime effortlessly.
    3. Wipe Clean
      Wipe away the foam residue with a damp microfiber cloth, revealing a streak-free shine.

    Degreasing Hard-to-Clean Cookware

    Tired of battling stubborn grease on your pots, pans, and baking trays? Shaving foam comes to the rescue with its degreasing properties.

    • Step 1: Coat the greasy surface with a thin layer of shaving foam.
    • Step 2: Allow it to sit for 5–10 minutes to break down the grease.
    • Step 3: Scrub lightly with a non-abrasive sponge and rinse thoroughly with warm water.

    Removing Stains from Countertops

    Spills and stains are inevitable in a busy kitchen, but they don’t have to be permanent. Shaving foam can be an effective stain remover for various countertop materials.

    • For Laminate and Tile:
      Apply shaving foam directly onto the stain. After a few minutes, let it rest and then use a moist towel to wipe it off.
    • For Granite and Marble:
      Use a gentle approach. Dab a small amount of shaving foam on the stain, buff gently, and wipe clean with a damp cloth. Avoid scrubbing too hard to protect the stone’s surface.

    Polishing Glassware and Mirrors

    Shaving foam can help you achieve crystal-clear glassware and mirrors without leaving streaks behind.

    1. Apply Foam Sparingly
      A small dollop of shaving foam is all you need.
    2. Spread Evenly
      Use a lint-free cloth to spread the foam over the glass surface.
    3. Buff and Shine
      Buff the surface until it sparkles, using a clean, dry cloth for the finishing touch.

    Refreshing Cutting Boards

    Cutting boards, especially wooden ones, can harbor odors and stains over time. Shaving foam can give them a quick refresh.

    • Step 1: Apply a layer of shaving foam to the board.
    • Step 2: Use a soft-bristled brush to scrub the foam into the surface.
    • Step 3: Rinse thoroughly with warm water and dry immediately.

    Clearing Up Sticky Messes

    From honey spills to sticky sauces, shaving foam can simplify cleanup.

    1. Apply Shaving Foam Generously
      Cover the sticky mess with shaving foam and let it sit for 2–3 minutes.
    2. Wipe Away Residue
      Use a damp cloth to wipe away the foam and the sticky substance underneath.

    Eliminating Odors from Trash Bins

    Trash bins can develop unpleasant odors despite regular cleaning. Shaving foam provides an easy deodorizing solution.

    • Spray a layer of shaving foam inside the bin.
    • Scrub thoroughly with a brush, focusing on the corners and crevices.
    • Rinse with water and dry before replacing the trash bag.

    Shaving Foam as a Carpet Stain Remover

    Kitchen carpets or rugs often fall victim to spills. Shaving foam works wonders as a carpet stain remover.

    1. Blot the Stain First
      Use a paper towel to remove excess liquid from the stain.
    2. Apply Shaving Foam
      Spread a thin layer of foam over the stained area.
    3. Work It In
      Gently work the foam into the fibers using a soft brush.
    4. Let It Sit
      Allow the foam to sit for 10–15 minutes before blotting it up with a clean, damp cloth.

    Tips for Using Shaving Foam Safely in the Kitchen

    • Choose Unscented Foam: To avoid lingering artificial scents in your kitchen, opt for unscented shaving foam.
    • Test First: Test a small, inconspicuous area of the surface before full application to ensure compatibility.
    • Avoid Food Contact Areas: Keep shaving foam away from areas that come into direct contact with food to ensure safety.

    Using shaving foam in the kitchen might seem unconventional, but its versatility and effectiveness make it a valuable addition to your cleaning toolkit. By following these tips, you can tackle stubborn messes and maintain a spotless kitchen effortlessly.

  • Wash her feet with mouthwash for 30 minutes. After that you won’t recognize her kicks.

    Wash her feet with mouthwash for 30 minutes. After that you won’t recognize her kicks.

    When it comes to innovative home remedies, few ideas stand out as intriguingly peculiar as washing feet with mouthwash. While it may sound unconventional, this practice is gaining popularity for its potential benefits. Let us explore how this surprising method can revitalize feet and leave them feeling fresh, clean, and healthy.


    What Happens When You Wash Feet with Mouthwash?

    Mouthwash, typically used for oral hygiene, contains antiseptic and antibacterial properties. When applied to the feet, it offers multiple benefits, including:

    • Fighting Foot Odor: Mouthwash helps eliminate odor-causing bacteria, leaving feet smelling fresh.
    • Reducing Fungal Infections: Its antifungal properties target common issues like athlete’s foot or toenail fungus.
    • Exfoliation and Skin Renewal: Some mouthwashes contain alcohol or essential oils that can help exfoliate dead skin cells, promoting smooth and healthy feet.

    Step-by-Step Guide to Washing Feet with Mouthwash

    1. Prepare the Soaking Solution

    Combine equal parts of mouthwash and warm water in a large basin. You may also add white vinegar for an enhanced antifungal effect.

    2. Soak Feet for 30 Minutes

    Immerse your feet in the solution and let them soak for half an hour. During this time, the active ingredients will work to cleanse and rejuvenate the skin.

    3. Scrub and Rinse

    After soaking, gently scrub the feet using a pumice stone or foot brush to remove dead skin. Rinse thoroughly with warm water.

    4. Dry and Moisturize

    Pat your feet dry with a clean towel and apply a rich moisturizer to lock in hydration and prevent dryness.


    Top Benefits of Washing Feet with Mouthwash

    1. Improved Skin Texture

    Mouthwash helps slough off dead skin, leaving feet feeling smooth and rejuvenated. Regular use can lead to a noticeable improvement in skin texture.

    2. Reduction of Bacterial and Fungal Growth

    The antiseptic nature of mouthwash makes it an effective tool against harmful microbes. It creates an inhospitable environment for bacteria and fungi, reducing the risk of infections.

    3. Alleviation of Common Foot Problems

    Mouthwash can help soothe conditions like athlete’s foot, cracked heels, and even minor irritations caused by dryness or poor hygiene.

    4. Confidence in Every Step

    Clean, healthy feet boost confidence, whether you’re walking barefoot at home or showing off your sandals outdoors.


    Common Questions About Using Mouthwash for Feet

    Is It Safe to Soak Feet in Mouthwash?

    Yes, most mouthwashes are safe for external use. However, if you have open wounds or sensitive skin, consult a doctor before trying this method.

    How Often Should You Use This Remedy?

    For general maintenance, soaking once a week is sufficient. If addressing specific issues like athlete’s foot, consult a specialist for a recommended schedule.

    Can All Mouthwashes Be Used?

    Non-alcoholic and antifungal mouthwashes are often preferred for foot soaks, as they are gentle and effective. Check the label to ensure suitability.


    Tips for Maximizing Results

    • Exfoliate Regularly: Pair mouthwash soaks with regular exfoliation for the best results.
    • Stay Consistent: Like any remedy, consistency is key to reaping long-term benefits.
    • Pair with Good Hygiene: Always wear clean socks and breathable shoes to maintain foot health.


    Alternative Uses of Mouthwash for Personal Care

    Mouthwash isn’t just for feet or oral hygiene. Its antiseptic properties make it a versatile addition to your self-care routine. Here are a few examples:

    • Hand Sanitizer: In emergencies, mouthwash can act as a makeshift hand sanitizer.
    • Dandruff Treatment: Apply to the scalp to reduce dandruff.
    • Bug Bite Relief: Dab a small amount on bug bites to alleviate itching.

    Conclusion

    Washing feet with mouthwash may sound unconventional, but its benefits are undeniable. By embracing this simple yet effective remedy, you can transform your foot care routine and enjoy healthier, fresher feet.

  • Your Nose: The First Indicator of Serious Health Problems

    Your Nose: The First Indicator of Serious Health Problems

    Your nose is more than just a central feature of your face or the organ responsible for your sense of smell—it can serve as an early warning system for various health conditions. Subtle changes in its appearance, function, or sensations may indicate underlying health issues that require attention. Here are some key symptoms and what they might reveal about your overall health:

    1. Persistent Nasal Congestion

    Chronic nasal congestion, especially if it doesn’t improve with over-the-counter remedies, could signal:

    • Allergies: Often seasonal but can also be triggered by environmental factors.
    • Sinusitis: A long-term inflammation of the sinuses, sometimes linked to infections.
    • Deviated Septum: A structural issue that may require medical intervention.
    • Polyps or Growths: Benign or malignant masses blocking the nasal passage.

    2. Frequent Nosebleeds

    Occasional nosebleeds are common, but frequent or heavy nosebleeds may point to:

    • High Blood Pressure: Persistent hypertension can weaken blood vessels in the nose.
    • Blood Disorders: Issues like low platelet count or clotting disorders.
    • Dry Air or Irritants: Chronic exposure can damage nasal tissues.

    Pages: 1 2 3

  • 10 Stunning Types of Nail Art Manicures for 2025

    10 Stunning Types of Nail Art Manicures for 2025

    The art of manicures has reached new creative heights in 2025. Nail art enthusiasts and professionals are embracing bold trends, intricate designs, and innovative techniques that take self-expression to a whole new level. Below, we explore 19 breathtaking types of nail art manicures that are set to dominate the beauty world in 2025.


    1. Minimalist Nail Art

    Simplicity meets elegance with minimalist nail designs. Clean lines, geometric shapes, and soft neutral tones define this trend. These designs are perfect for those seeking a modern, understated look that exudes sophistication.


    2. Chrome Finish Nails

    The chrome effect has gained immense popularity. These shiny, mirror-like nails are available in various colors, from classic silver to bold metallic hues, offering a futuristic vibe that complements any outfit.


    3. 3D Nail Art

    For a truly standout manicure, 3D nail art is unmatched. Think jewels, pearls, and sculpted designs that add depth and texture to your nails. These intricate embellishments are perfect for special occasions.


    4. French Tips with a Twist

    The classic French manicure gets a 2025 update with colorful tips, glitter accents, and unique shapes. From ombre effects to angled tips, this twist on a classic is both timeless and trendy.


    5. Abstract Nail Art

    Abstract patterns featuring splashes of color, irregular shapes, and artistic strokes are trending. These designs let creativity shine, making each manicure a miniature masterpiece.


    6. Animal Print Nails

    Animal prints are back and bolder than ever. Leopard spots, zebra stripes, and snakeskin patterns dominate nail art, often paired with bright colors or metallic accents for added flair.


    7. Negative Space Designs

    Negative space nails leave parts of the natural nail exposed, creating striking contrasts with bold patterns or soft pastels. This chic style is perfect for those who love modern and artistic aesthetics.


    8. Neon Nail Art

    Bright, bold, and attention-grabbing, neon nails are ideal for making a statement. Popular choices include neon ombre effects, vibrant geometric patterns, and even neon French tips.


    9. Holographic Nails

    The iridescent shimmer of holographic nails gives off a multidimensional effect. Available in various shades, this trend reflects light beautifully, creating a dazzling display on your fingertips.


    10. Matte Finish Nails

    A departure from glossy manicures, matte nails offer a velvety texture that looks effortlessly chic. Pair matte finishes with bold colors or intricate patterns for a sophisticated look.

  • Baking soda is a gardener’s best friend – here are 14 clever uses for it in the garden.

    Baking soda is a gardener’s best friend – here are 14 clever uses for it in the garden.

    Gardening can be both an art and a science, requiring careful attention to soil, plants, pests, and overall garden health. Fortunately, baking soda, an inexpensive and widely available household item, has proven to be an indispensable tool for gardeners. Below, we explore 14 clever ways to use baking soda in your garden, ensuring thriving plants and an eco-friendly approach to gardening.

    1. Natural Fungicide for Plants

    Fungal diseases like powdery mildew and black spot can wreak havoc on your plants. Baking soda provides a natural solution. Combine 1 tablespoon of baking soda, 1 gallon of water, and a few drops of dish soap. Spray this mixture on affected plants to neutralize fungal spores and prevent the disease from spreading.

    2. Pest Control Without Chemicals

    Baking soda can deter common pests such as aphids, ants, and spider mites. Dust a small amount around the base of plants or mix with water to create a spray. This method keeps pests at bay without harming beneficial insects.

    3. Sweeten Your Tomatoes

    Did you know that baking soda can enhance the sweetness of your tomatoes? Sprinkling a small amount of baking soda around the base of tomato plants reduces soil acidity, resulting in sweeter fruit. Be sure not to overdo it, as excess baking soda can harm the soil.

    4. Clean Gardening Tools and Pots

    Gardening tools and pots often accumulate dirt, sap, and rust. A paste made of baking soda and water works wonders to clean and disinfect them. Scrub with a brush and rinse thoroughly to keep your tools in top shape.

    5. Test Soil pH Easily

    Understanding your soil’s pH is essential for healthy plants. To test pH, mix baking soda with water and pour it over a soil sample. If the mixture fizzes, your soil is acidic. This simple test can guide your soil amendments.

    6. Control Weeds Effectively

    Baking soda acts as a natural weed killer when applied directly to cracks and crevices where weeds grow. Its high sodium content dehydrates weeds, making it an effective and eco-friendly alternative to chemical herbicides.

    7. Deodorize Compost Piles

    Composting is an excellent way to recycle organic waste, but it often comes with unpleasant odors. Sprinkling baking soda over your compost pile neutralizes odors without affecting the decomposition process.

    8. Protect Fruits and Vegetables from Rot

    Preventing rot is crucial for preserving your harvest. A solution of baking soda and water sprayed on fruits and vegetables creates a protective barrier against mold and rot. Use it sparingly to avoid altering the soil balance.

    9. Keep Slugs and Snails Away

    Slugs and snails can damage tender plants. Sprinkle a barrier of baking soda around the base of plants to deter these pests. The texture and alkalinity of baking soda are unappealing to them, keeping your plants safe.

    10. Enhance Flower Blooms

    Certain flowering plants, like geraniums and begonias, benefit from slightly alkaline soil. Adding a small amount of baking soda to the soil can encourage vibrant blooms and improve overall plant health.

    11. Remove Garden Grime from Hands

    After a long day of gardening, your hands may be covered in dirt and grime. A paste of baking soda and water effectively cleans hands while being gentle on the skin. Rinse with water, and your hands will feel refreshed.

    12. Eliminate Ant Hills

    Ant infestations in the garden can disrupt plant roots. Sprinkle baking soda directly onto ant hills, then follow up with a splash of vinegar. This combination eliminates ants and their nests naturally.

    13. Keep Cut Flowers Fresh

    Baking soda can prolong the life of cut flowers. Add a teaspoon to the water in your vase to prevent bacteria growth, keeping your flowers looking fresh longer.

    14. Absorb Excess Moisture

    Gardens with poor drainage are prone to waterlogging, which can harm plant roots. Baking soda absorbs excess moisture in small problem areas, helping to protect your plants from root rot.

    By integrating baking soda into your gardening routine, you can solve common challenges, improve plant health, and maintain an eco-friendly environment. From pest control to soil enhancement, this versatile household staple truly lives up to its reputation as a gardener’s best friend.

  • Fresh and spotless toilets for a week : a tip used even by cleaners

    Fresh and spotless toilets for a week : a tip used even by cleaners

    eeping toilets fresh and spotless for an entire week is a challenge for many households and businesses alike. With proper techniques and a few expert tips, it is entirely possible to achieve cleanliness that rivals professional standards. In this comprehensive guide, we’ll explore proven strategies to maintain immaculate and fresh-smelling toilets, ensuring they remain hygienic and welcoming.

    The Importance of Clean Toilets for Hygiene and Comfort

    Toilets are among the most frequently used areas in any home or facility. Maintaining their cleanliness is essential not just for aesthetic reasons but also to prevent the spread of bacteria and odors. A well-maintained toilet enhances comfort and reflects positively on its users. With the right approach, you can ensure cleanliness while saving time and effort.

    Essential Supplies for Spotless Toilets

    Before starting, gather the following cleaning essentials to make the process efficient and effective:

    • High-quality toilet cleaner: Choose a product with disinfecting properties.
    • Toilet brush: Opt for a sturdy, long-handled brush.
    • Microfiber cloths: These are excellent for wiping and polishing surfaces.
    • Rubber gloves: Protect your hands during the cleaning process.
    • Baking soda and white vinegar: These natural cleaners are great for tackling stains and odors.
    • Essential oils or air fresheners: To maintain a pleasant scent throughout the space.
    • Disposable wipes or paper towels: Ideal for quick touch-ups.

    Step-by-Step Guide to Keep Your Toilet Fresh for Seven Days

    1. Perform a Deep Clean at the Start of the Week

    A thorough cleaning session sets the stage for long-lasting freshness. Follow these steps:

    • Apply a toilet cleaner: Coat the inner bowl thoroughly and let it sit for 10-15 minutes. This helps break down grime and kill bacteria.
    • Scrub with a toilet brush: Focus on areas under the rim and at the base of the bowl.
    • Rinse and flush: Ensure all cleaning residue is removed.
    • Clean exterior surfaces: Use disinfectant wipes or a microfiber cloth with a cleaning solution to wipe the tank, seat, and base.

    2. Maintain Daily Freshness with Quick Routines

    Consistency is key to maintaining cleanliness:

    • Flush properly after every use: Encourage all users to flush thoroughly to prevent residue buildup.
    • Wipe down surfaces: Spend 1-2 minutes daily wiping high-touch areas such as the seat and flush handle.
    • Sprinkle baking soda: A small amount in the bowl helps neutralize odors and prevent stains.

    3. Control Odors Effectively

    Unpleasant smells can make even a clean toilet feel uninviting:

    • Use air fresheners: Choose sprays or gel-based fresheners for long-lasting effects.
    • Ventilation matters: Open windows or use exhaust fans to improve airflow.
    • Essential oils trick: Add a few drops of your favorite essential oil into the toilet tank for a subtle, pleasant aroma with every flush.

    Advanced Tips for Long-Lasting Cleanliness

    1. Protect Surfaces with Anti-Stain Products

    Anti-stain sprays or coatings can form a barrier on ceramic surfaces, reducing grime buildup. Use these products weekly for optimal results.

    2. Introduce Automatic Cleaning Tablets

    Drop-in toilet cleaning tablets release cleaning agents with every flush, keeping the bowl fresh between deep cleans. Opt for eco-friendly options to minimize environmental impact.

    3. Invest in a Bidet Attachment

    A bidet not only enhances hygiene but also reduces toilet paper residue, making the toilet easier to clean and maintain.

    Common Mistakes to Avoid

    1. Neglecting the flush handle: This is one of the dirtiest parts of the toilet; wipe it daily.
    2. Skipping the exterior base: Dust and spills often accumulate around the toilet base, contributing to odors.
    3. Overlooking ventilation: Poor airflow promotes the growth of mold and mildew.

    Eco-Friendly Practices for Sustainable Cleaning

    Adopt environmentally conscious habits to ensure a greener approach:

    • Use natural cleaners like baking soda and vinegar.
    • Opt for biodegradable cleaning wipes.
    • Conserve water by using dual-flush systems.

    Final Touches for a Spotless Finish

    Once the toilet is clean, take these extra steps:

    • Polish chrome fittings such as handles and hinges.
    • Add a decorative touch with a small vase or plant to elevate the space.
    • Ensure all supplies are neatly stored for easy access during quick cleanups.

    Maintaining a fresh and spotless toilet for a week doesn’t have to be overwhelming. By following these expert cleaning tips, you’ll achieve a clean and hygienic bathroom environment with minimal effort.