Category: Tips home

  • MAGNESIUM SULFATE : How to Get More Blooms on Your Hydrangeas

    MAGNESIUM SULFATE : How to Get More Blooms on Your Hydrangeas

    Hydrangeas are beloved for their vibrant, showy blooms that can transform any garden into a picturesque haven. Yet, many gardeners face the frustration of sparse or lackluster flowers on their hydrangeas. Enter magnesium sulfate—a gardener’s secret weapon for healthier, more prolific blooms. This common compound, also known as Epsom salt, is a natural and effective way to boost hydrangea flowering. In this article, we’ll explore how magnesium sulfate works, how to use it properly, and why it’s a game-changer for hydrangea enthusiasts.

    Understanding Magnesium Sulfate

    The mineral component magnesium sulfate is made up of magnesium, sulfur, and oxygen. Its primary benefit for plants lies in its magnesium content, an essential nutrient for photosynthesis. Magnesium helps in the production of chlorophyll, which is critical for energy generation in plants. Sulfur, on the other hand, plays a vital role in synthesizing certain amino acids and proteins necessary for plant health.

    When hydrangeas are deficient in magnesium, their growth can be stunted, and their blooms may lack vibrancy or fail to appear altogether. Magnesium sulfate can address these issues by enriching the soil and promoting healthier plant development.

    Signs Your Hydrangeas Need Magnesium Sulfate

    Before applying magnesium sulfate, it’s crucial to recognize the signs of magnesium deficiency in hydrangeas. Common symptoms include:

    1. Yellowing Leaves: Older leaves may turn yellow while veins remain green, a condition known as interveinal chlorosis.
    2. Poor Flowering: Fewer or smaller blooms than usual.
    3. Weak Growth: Slower growth and less robust stems and foliage.

    If your hydrangeas exhibit these signs, a magnesium sulfate treatment may be just what they need.

    How Magnesium Sulfate Enhances Flowering

    Magnesium sulfate enhances hydrangea flowering in several ways:

    1. Improved Nutrient Uptake: Magnesium aids in the absorption of other essential nutrients, such as phosphorus, which is vital for flower production.
    2. Enhanced Chlorophyll Production: By boosting chlorophyll levels, magnesium sulfate ensures that plants have the energy needed for vigorous growth and flowering.
    3. Soil pH Adjustment: Although magnesium sulfate itself doesn’t significantly alter soil pH, it can improve nutrient availability in slightly acidic to neutral soils, which hydrangeas prefer.

    Applying Magnesium Sulfate to Hydrangeas

    Using magnesium sulfate for hydrangeas is straightforward, but proper application is key to reaping its benefits. Here’s how to do it:

    1. Soil Test First

    Before adding any fertilizer, conduct a soil test to check magnesium levels. Excess magnesium can harm plants and disrupt soil balance.

    2. Mixing the Solution

    For hydrangeas, dissolve 1 tablespoon of magnesium sulfate in 1 gallon of water. Stir until fully dissolved.

    3. Applying to Soil

    Pour the solution around the base of the hydrangea, focusing on the root zone. Avoid splashing the leaves, as direct contact can cause minor leaf burns.

    4. Foliar Spray (Optional)

    For a quick nutrient boost, use the same solution as a foliar spray. Apply it to the leaves early in the morning or late in the afternoon to avoid evaporation.

    5. Frequency of Application

    Use the magnesium sulfate solution once every four to six weeks during the growing season. Overuse can lead to nutrient imbalances, so moderation is crucial.

    Complementary Practices for Better Results

    While magnesium sulfate can significantly improve flowering, combining it with other good gardening practices will yield the best results:

    1. Proper Watering: Hydrangeas thrive in consistently moist soil. Water often and thoroughly, especially when it’s dry.
    2. Mulching: To control temperature and hold onto soil moisture, spread a layer of mulch around the base that is two to three inches thick.
    3. Balanced Fertilization: In addition to magnesium sulfate, use a balanced fertilizer with nitrogen, phosphorus, and potassium to meet all nutrient needs.
    4. Pruning: To promote new growth and enhance air circulation, trim any dead or weak stems.
    5. Sunlight: Ensure your hydrangeas receive the right amount of sunlight—morning sun and afternoon shade work best for most varieties.

    The Science Behind the Bloom Transformation

    Scientific studies have shown that magnesium plays a pivotal role in improving flower production across various plant species. Hydrangeas, in particular, benefit from the improved photosynthesis and nutrient absorption facilitated by magnesium sulfate. Sulfur’s role in protein synthesis further supports robust plant growth, setting the stage for an abundance of blooms.

    Final Thoughts

    Magnesium sulfate is a simple yet powerful tool for boosting hydrangea health and flowering. By addressing magnesium deficiencies, this mineral compound ensures your hydrangeas are equipped to produce the vibrant blooms you desire. Remember to use it judiciously and pair it with proper gardening practices for the best results.

    With a little effort and the right care, your hydrangeas can become the star attraction of your garden, rewarding you with their breathtaking beauty season after season. Give magnesium sulfate a try and watch your garden flourish like never before!

  • 7 Parts of the Body Where You Can Apply Deodorant

    7 Parts of the Body Where You Can Apply Deodorant

    Deodorant is a crucial personal care product that helps maintain freshness and confidence throughout the day. While most of us are familiar with applying it to the underarms, there are several other parts of the body where deodorant can be applied to enhance its effectiveness. This article explores the seven key areas where deodorant can be used to combat odor, reduce sweat, and keep you feeling refreshed all day long.

    1. Underarms – The Most Common Area

    The underarms are the most well-known and frequent area where deodorant is applied. This area contains a high concentration of sweat glands, and it is one of the primary sources of body odor. Deodorants work by neutralizing the bacteria that cause the smell, while antiperspirants help reduce sweat. The skin under the arms can be sensitive, so using a deodorant with gentle, moisturizing ingredients can help prevent irritation and keep the skin healthy.

    Why Underarms are Prone to Odor

    The underarms are warm and moist, making them the perfect breeding ground for bacteria. Sweat by itself doesn’t smell, but when bacteria break it down, it creates an unpleasant odor. Applying deodorant to this area helps maintain a fresh smell throughout the day.

    2. Groin Area – A Lesser-Known Target

    The groin area is another body part that produces a significant amount of sweat, especially during hot weather or intense physical activity. Like the underarms, the groin area can develop a noticeable odor if not properly cared for. Applying a fragrance-free or specially formulated deodorant can help keep this sensitive area fresh. Be sure to choose products that are safe for the skin and avoid those that contain harsh chemicals, as this area is more sensitive than others.

    Importance of Staying Fresh in the Groin Area

    The groin area is susceptible to moisture buildup, which can cause friction and irritation. Using deodorant can reduce sweat, making it more comfortable and hygienic throughout the day, especially for those who engage in sports or have an active lifestyle.

    3. Feet – A Common Source of Odor

    Your feet can generate a lot of sweat, particularly when you’re wearing closed shoes for extended periods. The combination of heat and sweat makes your feet prone to unpleasant odors. Specialized foot deodorants are designed to eliminate bacteria and reduce the risk of fungal infections that thrive in damp conditions. Spraying or applying deodorant to your feet before putting on socks can help keep them dry and odor-free.

    How Foot Deodorants Work

    Foot deodorants contain ingredients that target sweat and bacteria. They help by drying the skin slightly and neutralizing odor-causing microbes. For best results, wash and thoroughly dry your feet before applying deodorant, especially between the toes, where moisture often collects.

    4. Back – A Surprising but Effective Spot

    The back may not seem like an obvious place to apply deodorant, but for those who experience back sweat, especially in hot weather or during physical activities, applying deodorant to this area can help reduce moisture. The back has many sweat glands, particularly in the upper back region. By applying a spray or roll-on deodorant, you can keep this area dry and prevent back sweat stains from forming on your clothing.

    Why You Should Apply Deodorant to the Back

    During exercise or outdoor activities, the back becomes a major area for sweat production. This can lead to discomfort and even cause breakouts due to clogged pores. Deodorant can help mitigate these issues by controlling sweat and keeping the skin drier.

    5. Chest – Ideal for Active Lifestyles

    The chest is another area where sweat can accumulate, particularly during exercise or in hot conditions. The chest and sternum can easily trap sweat under tight-fitting clothing, leading to discomfort and odor. Applying deodorant to this area can help control sweat production and keep you feeling fresher during and after your workout.

    Why Chest Sweat is a Concern

    Sweat from the chest can cause chafing, irritation, and even acne. Using a deodorant designed for the chest area will not only help control sweat but also protect the skin from breakouts and rashes caused by friction and moisture.

    6. Behind the Knees – An Overlooked Area

    The area behind the knees is often overlooked when it comes to sweat and odor, but it can be a hotspot for moisture, especially in humid climates. Applying deodorant behind the knees can help prevent sweat from accumulating in this area, reducing the risk of irritation and chafing. This is particularly helpful during the summer months or when wearing tight pants.

    Why Behind the Knees?

    Like the underarms and groin, the skin behind the knees tends to trap heat and moisture, making it a potential area for odor development. A quick spray or swipe of deodorant can go a long way in keeping this area dry and comfortable throughout the day.

    7. Inner Thighs – For Athletes and Active Individuals

    The inner thighs can become a problem area for sweat, especially for athletes or those who walk or run frequently. The friction between the thighs can cause irritation, rashes, and even chafing. Applying deodorant to the inner thighs can reduce friction, prevent thigh rub, and keep you feeling comfortable during physical activity.

    Benefits of Deodorant on the Inner Thighs

    Deodorant in this area acts as a barrier to moisture, reducing the chances of chafing and irritation. It’s particularly useful for those who wear skirts or shorts in warm weather, as it helps keep the skin smooth and rash-free.

    Conclusion: Freshness All Day Long

    Deodorant is more versatile than most people realize. By applying it to different areas of the body, such as the underarms, groin, feet, back, chest, behind the knees, and inner thighs, you can stay fresh and comfortable throughout the day. Each of these areas has specific sweat glands that produce moisture and odor, making them prime targets for deodorant application. Whether you’re engaging in physical activity or just going about your daily routine, using deodorant on these parts of your body can make a significant difference in how you feel and smell.

  • 5 Things You Should Never Share With Other People About Your Personal Life

    5 Things You Should Never Share With Other People About Your Personal Life

    In this digital age, where sharing every aspect of our lives has become the norm on social media, it’s crucial to recognize the boundaries that should be maintained. Oversharing personal information can have long-lasting consequences on your privacy and well-being. In this article, we’ll delve into the five things you should never share with other people about your personal life, emphasizing the importance of setting limits and safeguarding your private space.

    1. Financial Details: Guarding Your Wealth

    Your financial information is akin to the crown jewels of your personal life. Revealing details about your income, expenses, or investments can make you vulnerable to identity theft, scams, or even unwanted judgments. It’s essential to keep your financial matters private to ensure the security of your hard-earned money.

    2. Intimate Relationship Issues: Privacy in Love

    While it’s natural to seek advice from friends or family during challenging times in your relationships, sharing intimate details about your partner or marriage can lead to unnecessary gossip and judgment. Maintain a level of privacy to protect the sanctity of your relationship and foster an environment for open communication between you and your significant other.

    3. Health Problems: Preserving Personal Well-being

    Health concerns are deeply personal matters that should be disclosed selectively. Revealing intricate details about your medical conditions can lead to misconceptions, stigmatization, or unsolicited advice. Maintain control over the information you share about your health, ensuring that you only disclose what you are comfortable revealing.

    4. Legal Issues: Safeguarding Your Reputation

    Legal matters are delicate subjects that can significantly impact your reputation. Sharing intricate details about ongoing legal issues might lead to unwanted scrutiny or bias. It’s essential to consult with legal professionals and keep the specifics of legal challenges within the appropriate channels to protect your integrity.

    5. Family Conflicts: Navigating Relationships with Care

    Family dynamics can be intricate, and conflicts are part of any familial relationship. However, openly discussing family disputes can strain relationships further and invite unnecessary opinions. When it comes to family matters, discretion is key. Handle conflicts privately, seeking professional advice if needed, and maintain a united front when interacting with others.

    Conclusion

    In navigating the delicate dance of personal privacy, it becomes evident that discretion is not about hiding, but rather about choosing what to share and with whom. By understanding the nuances of guarding certain aspects of our lives, we create a foundation for strong, healthy relationships and a thriving professional life.

    [sharethis-inline-buttons]

  • 8 best tips to lift sagging breasts

    8 best tips to lift sagging breasts

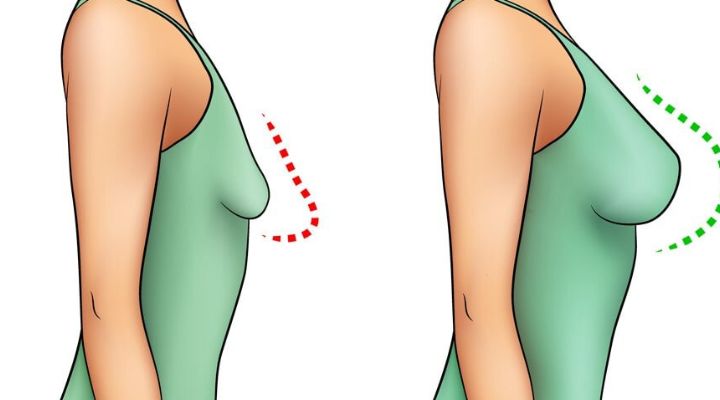
    One of the primary contributors to sagging breasts is weight fluctuations. Rapid weight gain or loss can stretch the skin and ligaments supporting the breasts, resulting in sagging. Therefore, maintaining a stable and healthy weight through a balanced diet and regular exercise is crucial. Incorporate foods rich in vitamins, minerals, and antioxidants to promote skin elasticity and overall breast health. Additionally, engaging in strength-training exercises can help tone the chest muscles, providing natural lift and support to the breasts.

    Proper hydration is essential for maintaining skin elasticity, including the skin around the breasts. Drinking an adequate amount of water throughout the day helps keep the skin hydrated, reducing the risk of sagging. Aim to drink at least eight glasses of water daily to support overall health and promote skin elasticity.

    Choosing the right bra size and style is vital for supporting the breasts and preventing sagging. Invest in supportive bras with adequate coverage and firm straps to provide proper lift and support. Avoid bras that are too tight or too loose, as they can cause discomfort and contribute to sagging over time. Consider getting professionally fitted for bras to ensure the perfect fit and optimal support for your breasts.

    Incorporating chest exercises into your fitness routine can help strengthen the muscles beneath the breasts, providing natural lift and support. Effective exercises include push-ups, chest presses, and chest flyes. Aim to perform these exercises at least two to three times per week to see noticeable improvements in breast firmness and appearance.

    Moisturizing the breasts regularly can help improve skin elasticity and reduce the appearance of sagging. Choose a high-quality moisturizer or breast firming cream and massage it into the skin using gentle circular motions. Massaging the breasts helps stimulate blood flow and lymphatic drainage, promoting overall breast health and firmness.

    Maintaining good posture is essential for supporting the breasts and preventing sagging. Slouching or hunching forward can cause the breasts to droop and appear less firm. Practice standing and sitting up straight, with your shoulders back and chest lifted. Strengthening the muscles of the back and core can also help improve posture and provide additional support to the breasts.

    Smoking and excessive sun exposure can accelerate skin aging and reduce skin elasticity, leading to sagging breasts. Quitting smoking and protecting the skin from harmful UV rays can help preserve skin firmness and prevent premature sagging. Wear sunscreen daily, avoid tanning beds, and limit exposure to direct sunlight to maintain healthy, youthful-looking breasts.

    Lifting sagging breasts is achievable with the right lifestyle choices and skincare habits. By maintaining a healthy weight, staying hydrated, wearing supportive bras, engaging in regular chest exercises, moisturizing and massaging the breasts, practicing good posture, and avoiding smoking and excessive sun exposure, you can promote breast health and enhance the appearance of your breasts naturally.

    FAQs

    1. What causes breasts to sag?
      • Breasts sag due to factors like aging, pregnancy, breastfeeding, weight fluctuations, and genetics.
    2. Can genetics influence breast sagging?
      • Yes, genetics play a role in determining breast size, shape, and elasticity, which can influence the likelihood of sagging.
    3. Are there any non-surgical methods to lift sagging breasts?
      • Yes, non-surgical methods include maintaining a healthy weight, wearing supportive bras, regular exercise, skincare routines, and practicing good posture.
    4. How long until using these recommendations yields results??
      • Results may vary depending on individual factors such as age, genetics, and consistency in following the tips. Generally, noticeable improvements may be seen within a few weeks to months of adopting these practices.
    5. Is surgery the only option for severely sagging breasts?
      • No, surgery is not the only option. However, in cases of severe sagging where non-surgical methods are ineffective, surgical procedures like breast lift (mastopexy) may be considered for achieving desired results.
  • Press this spot and you will poop immediately

    Press this spot and you will poop immediately

    If you’ve ever experienced the sudden urge to poop after pressing a certain spot on your body, you’re not alone. This phenomenon, though seemingly bizarre, is more common than you might think. In this article, we’ll delve into the intriguing world of pressing a specific spot and experiencing immediate bowel movements, exploring the science behind it and debunking any misconceptions.

    2. Understanding the phenomenon

    Many people have experienced the sensation of needing to poop immediately after applying pressure to a particular spot on their body. While it may seem strange, there’s actually a scientific explanation for why this happens. When pressure is applied to certain areas, it can stimulate the nerves responsible for bowel movements, triggering the urge to poop.

    3. Reflexology and pressure points

    In reflexology, pressure is applied to particular body locations to facilitate healing and relaxation. It is thought that the many organs and systems in the body correspond to these pressure spots. By targeting these points, practitioners aim to improve overall health and wellbeing.

    4. The spot to press

    One of the most well-known pressure points for inducing bowel movements is located on the abdomen. To find it, locate the area about two inches below the navel and apply firm pressure using your fingertips. This spot is believed to stimulate the colon and promote bowel movements.

    5. Immediate effects

    One of the most remarkable things about pressing this spot is how quickly it can lead to bowel movements. For many people, the urge to poop is almost instantaneous, making it a reliable method for relieving constipation or promoting regularity.

    6. Health benefits

    In addition to its immediate effects on bowel movements, pressing this spot may also offer other health benefits. Some people report feeling less bloated and more comfortable after using this technique. Additionally, it may help to relieve stress and tension in the abdomen, promoting overall relaxation.

    7. Precautions and considerations

    While pressing this spot can be effective for some people, it’s not suitable for everyone. Pregnant women, in particular, should avoid applying pressure to this area, as it may stimulate uterine contractions. Additionally, anyone with underlying health conditions should consult with a healthcare professional before attempting this technique.

    8. Practical application

    If you’re experiencing constipation or simply want to promote regular bowel movements, pressing this spot may be worth a try. To do so effectively, lie down on your back and gently press the area below your navel with your fingertips. Hold the pressure for a few seconds, then release and repeat as needed.

    9. Conclusion

    In conclusion, pressing a specific spot on the abdomen can indeed lead to immediate bowel movements for many people. While the science behind this phenomenon is still being explored, the anecdotal evidence suggests that it can be an effective method for relieving constipation and promoting regularity. However, it’s essential to approach this technique with caution and consult with a healthcare professional if you have any concerns.

    FAQs:

    1. Is it safe to press this spot if I’m pregnant?
      • Pregnant women should avoid pressing this spot, as it may stimulate uterine contractions.
    2. How long should I hold the pressure?
      • Hold the pressure for a few seconds, then release and repeat as needed.
    3. Can pressing this spot help with bloating?
      • Some people report feeling less bloated after pressing this spot, but results may vary.
    4. Are there any risks associated with pressing this spot?
      • While it’s generally safe for most people, those with underlying health conditions should consult with a healthcare professional first.
    5. Can pressing this spot help with stress relief?
      • In addition to promoting bowel movements, pressing this spot may also help to relieve stress and tension in the abdomen.
  • The Mind-blowing Baking Soda Beauty Tricks Every Woman Should Know

    The Mind-blowing Baking Soda Beauty Tricks Every Woman Should Know

    Baking soda, also known as sodium bicarbonate, is a versatile ingredient that extends far beyond the realm of baking. Its uses span across various household tasks, but perhaps one of its most underrated applications lies in the realm of beauty. From skincare to haircare, and even dental care, baking soda boasts a plethora of beauty tricks that every woman should know about.

    Facial Cleansing with Baking Soda

    Facial cleansing is a crucial step in any skincare routine, and using baking soda can elevate your cleansing game to the next level. Baking soda acts as a gentle exfoliant, helping to remove dead skin cells and unclog pores, leaving your skin feeling refreshed and rejuvenated.

    To cleanse your face with baking soda, simply mix a small amount with water to form a paste, then gently massage it onto damp skin in circular motions. Rinse thoroughly with warm water and pat dry for beautifully cleansed skin.

    Exfoliating with Baking Soda

    Exfoliation is key to maintaining healthy, radiant skin, and baking soda can serve as a fantastic exfoliant. Its fine texture helps to slough away dead skin cells, revealing smoother, softer skin underneath.

    For an easy DIY exfoliating scrub, mix equal parts baking soda and water to form a paste. Gently massage the mixture onto damp skin, focusing on areas prone to dryness or roughness, then rinse off with lukewarm water.

    Brightening Skin Tone with Baking Soda

    If you’re looking to achieve a brighter, more even skin tone, look no further than baking soda. Its alkaline properties help to balance the skin’s pH levels, resulting in a more radiant complexion.

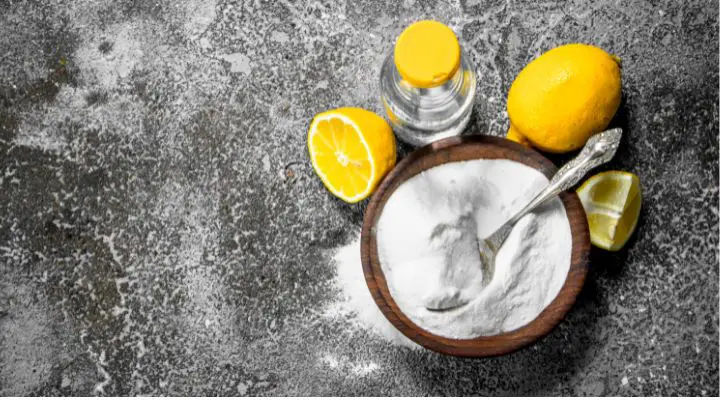
    To brighten your skin tone with baking soda, simply mix a teaspoon of baking soda with a few drops of lemon juice to form a paste. Apply the mixture to your face, taking care not to get any in your eyes. Let it sit for five to ten minutes, then rinse it off with water.

    Treating Acne and Blemishes

    Acne and blemishes can be a source of frustration for many, but baking soda offers a natural solution. Its anti-inflammatory properties help to reduce redness and swelling associated with acne, while its exfoliating properties help to unclog pores and prevent further breakouts.

    To treat acne and blemishes with baking soda, mix a small amount with water to form a paste, then apply it directly to the affected areas. Leave it on for 10-15 minutes before rinsing off with warm water, then pat dry.

    Natural Deodorant Alternative

    Concerns over the ingredients found in conventional deodorants have led many to seek out natural alternatives, and baking soda fits the bill perfectly. Its odor-neutralizing properties help to combat body odor without the use of harsh chemicals.

    To make your own natural deodorant with baking soda, simply mix equal parts baking soda and cornstarch, then add a few drops of your favorite essential oil for fragrance. Apply the mixture to clean, dry underarms for all-day freshness.

    Hair Cleansing and Clarifying

    Over time, hair can become weighed down by product buildup and environmental impurities, but baking soda can help to clarify and cleanse your locks. Its gentle yet effective formula removes excess oil and residue, leaving your hair feeling clean and revitalized.

    To clarify your hair with baking soda, mix a tablespoon of baking soda with water to form a paste, then massage it into your scalp and hair. Leave it on for a few minutes before rinsing thoroughly with water, then follow up with your regular shampoo and conditioner routine.

    Whitening Teeth Naturally

    A bright, white smile is often associated with good oral hygiene and overall health, and baking soda can help you achieve just that. Its mild abrasive properties help to remove surface stains and discoloration, resulting in a brighter, whiter smile.

    To whiten your teeth naturally with baking soda, simply dip your toothbrush into some baking soda and brush as usual. Alternatively, you can mix baking soda with a small amount of water to form a paste and apply it to your teeth using your finger or a cotton swab.

    Soothing Sunburns and Skin Irritations

    Sunburns and skin irritations can leave your skin feeling sore and inflamed, but baking soda can provide relief. Its anti-inflammatory properties help to soothe redness and irritation, while its alkaline nature helps to balance the skin’s pH levels.

    To soothe sunburns and skin irritations with baking soda, dissolve a cup of baking soda in a warm bath and soak for 15-20 minutes. Alternatively, you can make a paste with baking soda and water and apply it directly to the affected areas for targeted relief.

    Foot Care with Baking Soda

    Proper foot care is essential for maintaining healthy, happy feet, and baking soda can help keep them in top condition. Its deodorizing properties help to neutralize odors, while its exfoliating properties help to soften rough, calloused skin.

    To give your feet some TLC with baking soda, simply dissolve a few tablespoons of baking soda in warm water and soak your feet for 15-20 minutes. For extra exfoliation, you can add a handful of epsom salt to the mixture.

    Natural Nail Care

    Healthy nails are a sign of good overall health, and baking soda can help you achieve strong, beautiful nails. Its antifungal properties help to combat nail infections, while its exfoliating properties help to remove dead skin cells around the nails.

    To care for your nails with baking soda, mix equal parts baking soda and water to form a paste, then gently massage it into your nails and cuticles. Rinse off with warm water and pat dry for healthier, happier nails.

    DIY Baking Soda Beauty Recipes

    The versatility of baking soda lends itself well to DIY beauty recipes, allowing you to customize your skincare and haircare routine to suit your needs. From face masks to hair treatments, the possibilities are endless.

    One popular DIY beauty recipe is a baking soda face mask, which can help to detoxify and brighten the skin. Simply mix equal parts baking soda and honey to form a paste, then apply it to your face and leave it on for 10-15 minutes before rinsing off with warm water.

    Safety Precautions and Tips

    While baking soda is generally safe for use on the skin and hair, there are a few precautions to keep in mind. It’s important to patch test any new beauty treatments, especially if you have sensitive skin, to avoid potential irritation or allergic reactions.

    Additionally, it’s essential to use baking soda in moderation, as overuse can lead to dryness and irritation. If you experience any adverse reactions, such as redness or itching, discontinue use immediately and consult a dermatologist.

    Incorporating Baking Soda into Daily Beauty Routine

    Incorporating baking soda into your daily beauty routine is easy and affordable, with a wide range of benefits for your skin, hair, and nails. Whether you’re looking to cleanse, exfoliate, or brighten, baking soda has got you covered.

    By following these simple tips and tricks, you can harness the power of baking soda to achieve healthier, more radiant skin, hair, and nails. Say goodbye to expensive beauty products and hello to natural, effective solutions with baking soda.

    Conclusion

    Baking soda is truly a powerhouse ingredient when it comes to beauty care, offering a multitude of benefits for the skin, hair, and nails. From cleansing and exfoliating to soothing and brightening, its versatility knows no bounds.

    By incorporating baking soda into your daily beauty routine, you can achieve healthier, happier skin, hair, and nails without breaking the bank. So why wait? Give these mind-blowing baking soda beauty tricks a try today and experience the difference for yourself!

  • IF YOU HAVE THIS PLANT IN YOUR HOUSE YOU WILL NEVER SEE MLCE, SPIDERS AND OTHER INSECTS AGAIN!

    IF YOU HAVE THIS PLANT IN YOUR HOUSE YOU WILL NEVER SEE MLCE, SPIDERS AND OTHER INSECTS AGAIN!

    Lavender, a versatile herb known for its delightful fragrance and myriad of uses, has been cherished for centuries for its aromatic and medicinal properties. Its enchanting scent and therapeutic qualities make it a popular choice in various products ranging from cosmetics to culinary delights.

    Introduction to Lavender

    What is Lavender?

    Lavender, scientifically known as Lavandula, is a flowering plant belonging to the mint family, Lamiaceae. It is native to the Mediterranean region but is now cultivated worldwide for its beauty, fragrance, and practical applications.

    Historical Significance

    Throughout history, lavender has been valued for its soothing aroma and medicinal benefits. Ancient civilizations such as the Egyptians, Greeks, and Romans used lavender in perfumes, bath rituals, and even as a natural remedy for ailments.

    Properties of Lavender

    Aromatic Qualities

    One of lavender’s most distinctive features is its captivating fragrance. The essential oils found in lavender contain compounds like linalool and linalyl acetate, which contribute to its sweet, floral scent.

    Medicinal Properties

    Lavender possesses various medicinal properties, including anti-inflammatory, antimicrobial, and analgesic effects. It is commonly used in aromatherapy to promote relaxation, relieve stress, and alleviate headaches.

    Repelling Insects and Spiders

    Lavender’s Natural Repellent Qualities

    Lavender is renowned for its ability to repel insects and spiders due to its strong scent. The aroma of lavender is pleasant to humans but repulsive to many pests, making it an effective natural insect repellent.

    Scientific Evidence

    Several studies have supported lavender’s efficacy as an insect and spider repellent. Research suggests that lavender essential oil disrupts the nervous system of insects, deterring them from entering treated areas.

    Using Lavender to Repel Insects and Spiders

    Essential Oils

    Lavender essential oil can be diluted with water and sprayed around the home to ward off insects and spiders. It can also be applied directly to the skin to deter mosquito bites.

    Sachets and Potpourri

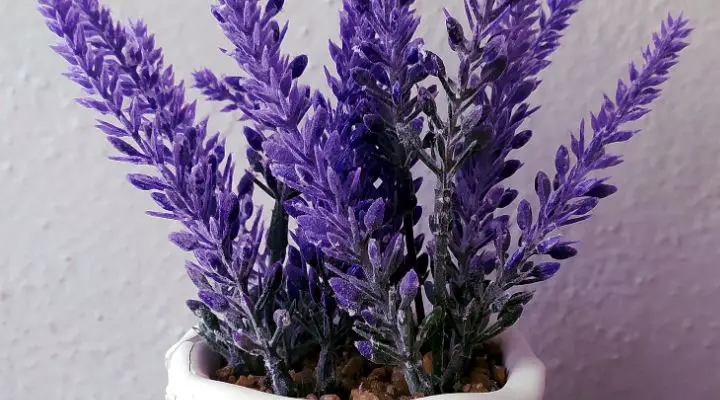
    Dried lavender flowers can be used to create sachets or potpourri pouches, which can be placed in closets, drawers, or under pillows to repel pests while adding a pleasant scent.

    Lavender-Infused Products

    Numerous household products, such as candles, soaps, and lotions, are infused with lavender essential oil to repel insects and spiders while providing a calming ambiance.

    Other Benefits of Lavender

    In addition to its insect-repelling properties, lavender offers a plethora of other benefits:

    • Stress Relief: Inhaling the scent of lavender can help reduce stress and anxiety, promoting a sense of calmness and relaxation.
    • Sleep Aid: Lavender has been shown to improve sleep quality and alleviate insomnia when used as a natural sleep aid.

    Culinary Uses of Lavender

    Beyond its aromatic and medicinal properties, lavender is also utilized in culinary applications:

    • Cooking and Baking: Culinary lavender adds a subtle floral flavor to various dishes and desserts, enhancing their taste and presentation.
    • Culinary Lavender Products: Specialty food items such as lavender-infused honey, teas, and syrups offer unique culinary experiences for adventurous palates.

    Conclusion

    In conclusion, lavender is a versatile herb with a rich history and an array of beneficial properties. From its delightful fragrance to its natural insect-repelling abilities, lavender continues to captivate and enchant people worldwide.