Der Anbau von Gurken im eigenen Garten ist nicht nur lohnend, sondern auch äußerst effizient, wenn bestimmte Regeln beachtet werden. Mit den folgenden acht Profi-Tipps gelingt es Ihnen, reiche Erträge mit knackigen, gesunden Gurken zu erzielen. Wir zeigen Ihnen detailliert, worauf es bei Standortwahl, Pflege, Sortenauswahl und Schädlingsschutz ankommt.
1. Den idealen Standort für Gurken wählen
Gurken sind wärmeliebende Pflanzen, die einen sonnigen, windgeschützten Platz benötigen. Ein Süd- oder Südwestbalkon, ein Gewächshaus oder ein freier Gartenplatz mit nährstoffreichem Boden sind optimal.
Mindestens 6 Stunden Sonne täglich
Kein Staunässegebiet – Gurken mögen gleichmäßige Feuchtigkeit, aber keine „nassen Füße“
Windschutz durch Hecken, Zäune oder andere Pflanzen
Ein lockerer, humoser Boden fördert das gesunde Wurzelwachstum und eine reiche Ernte.
2. Hochwertige Gurkensorten gezielt auswählen
Es gibt zahlreiche Gurkensorten, die sich in Wuchsform, Geschmack und Resistenzen unterscheiden. Je nach Platz und Anbauart (Freiland, Hochbeet, Gewächshaus) sollten gezielt Sorten gewählt werden.
Freilandgurken: robust, widerstandsfähig gegen Mehltau (z. B. ‘Diamant’, ‘Marketmore’)
Gewächshausgurken: ertragreich, länglich, kernarm (z. B. ‘Bella’, ‘Delikateß’)
Snackgurken / Minigurken: perfekt für den Balkon (z. B. ‘Iznik’, ‘Picolino’)
Tipp: Setzen Sie auf resistente Hybridsorten, um Krankheitsausfälle zu minimieren.
Gardening can be both an art and a science, requiring careful attention to soil, plants, pests, and overall garden health. Fortunately, baking soda, an inexpensive and widely available household item, has proven to be an indispensable tool for gardeners. Below, we explore 14 clever ways to use baking soda in your garden, ensuring thriving plants and an eco-friendly approach to gardening.
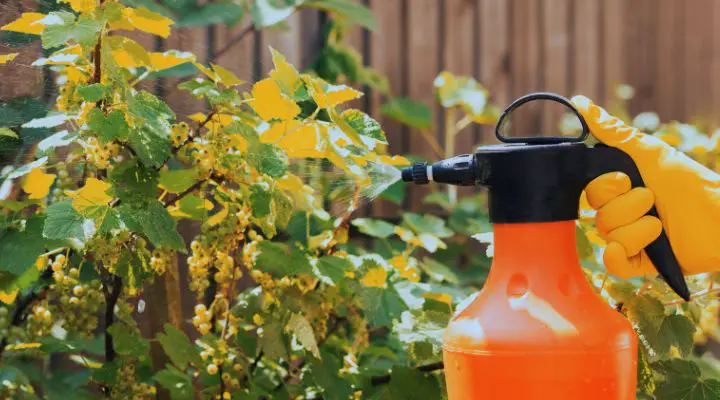
1. Natural Fungicide for Plants
Fungal diseases like powdery mildew and black spot can wreak havoc on your plants. Baking soda provides a natural solution. Combine 1 tablespoon of baking soda, 1 gallon of water, and a few drops of dish soap. Spray this mixture on affected plants to neutralize fungal spores and prevent the disease from spreading.
2. Pest Control Without Chemicals
Baking soda can deter common pests such as aphids, ants, and spider mites. Dust a small amount around the base of plants or mix with water to create a spray. This method keeps pests at bay without harming beneficial insects.
3. Sweeten Your Tomatoes
Did you know that baking soda can enhance the sweetness of your tomatoes? Sprinkling a small amount of baking soda around the base of tomato plants reduces soil acidity, resulting in sweeter fruit. Be sure not to overdo it, as excess baking soda can harm the soil.
4. Clean Gardening Tools and Pots
Gardening tools and pots often accumulate dirt, sap, and rust. A paste made of baking soda and water works wonders to clean and disinfect them. Scrub with a brush and rinse thoroughly to keep your tools in top shape.
5. Test Soil pH Easily
Understanding your soil’s pH is essential for healthy plants. To test pH, mix baking soda with water and pour it over a soil sample. If the mixture fizzes, your soil is acidic. This simple test can guide your soil amendments.
6. Control Weeds Effectively
Baking soda acts as a natural weed killer when applied directly to cracks and crevices where weeds grow. Its high sodium content dehydrates weeds, making it an effective and eco-friendly alternative to chemical herbicides.
7. Deodorize Compost Piles
Composting is an excellent way to recycle organic waste, but it often comes with unpleasant odors. Sprinkling baking soda over your compost pile neutralizes odors without affecting the decomposition process.
8. Protect Fruits and Vegetables from Rot
Preventing rot is crucial for preserving your harvest. A solution of baking soda and water sprayed on fruits and vegetables creates a protective barrier against mold and rot. Use it sparingly to avoid altering the soil balance.
9. Keep Slugs and Snails Away
Slugs and snails can damage tender plants. Sprinkle a barrier of baking soda around the base of plants to deter these pests. The texture and alkalinity of baking soda are unappealing to them, keeping your plants safe.
10. Enhance Flower Blooms
Certain flowering plants, like geraniums and begonias, benefit from slightly alkaline soil. Adding a small amount of baking soda to the soil can encourage vibrant blooms and improve overall plant health.
11. Remove Garden Grime from Hands
After a long day of gardening, your hands may be covered in dirt and grime. A paste of baking soda and water effectively cleans hands while being gentle on the skin. Rinse with water, and your hands will feel refreshed.
12. Eliminate Ant Hills
Ant infestations in the garden can disrupt plant roots. Sprinkle baking soda directly onto ant hills, then follow up with a splash of vinegar. This combination eliminates ants and their nests naturally.
13. Keep Cut Flowers Fresh
Baking soda can prolong the life of cut flowers. Add a teaspoon to the water in your vase to prevent bacteria growth, keeping your flowers looking fresh longer.
14. Absorb Excess Moisture
Gardens with poor drainage are prone to waterlogging, which can harm plant roots. Baking soda absorbs excess moisture in small problem areas, helping to protect your plants from root rot.
By integrating baking soda into your gardening routine, you can solve common challenges, improve plant health, and maintain an eco-friendly environment. From pest control to soil enhancement, this versatile household staple truly lives up to its reputation as a gardener’s best friend.
In a world where simple household items can serve multiple purposes, cinnamon and toilet paper are surprising heroes. This unusual combination has been making waves for its numerous benefits. Let’s explore why sprinkling cinnamon on toilet paper might just change your life.
What Makes Cinnamon So Special?
Cinnamon is more than just a fragrant spice used in desserts. It is a powerhouse of antioxidants, antimicrobial properties, and natural soothing capabilities. For centuries, it has been celebrated for its medicinal and aromatic properties, making it a staple in traditional remedies.
When combined with the humble toilet paper, cinnamon transforms into an innovative tool for home hygiene, pest control, and personal care. Here’s why:
Eliminating Odors Naturally
One of the most practical uses of this trick is its ability to eliminate foul odors. Sprinkling cinnamon on a piece of toilet paper and placing it in problem areas like bathrooms, closets, or trash bins can neutralize unpleasant smells instantly. Cinnamon’s natural oils work as a deodorizer, providing a fresh, inviting scent without the need for chemical sprays.
How to Do It
Take a sheet of toilet paper.
Sprinkle a small amount of ground cinnamon evenly across it.
Place the paper discreetly in the desired area.
This simple method ensures your home smells delightful without the need for synthetic air fresheners.
A Natural Pest Repellent
Cinnamon’s strong aroma is not only pleasing to humans but also acts as a natural deterrent for insects and pests. Ants, mosquitoes, and even cockroaches are repelled by its scent, making it a safer alternative to chemical repellents.
Steps to Repel Pests
Sprinkle cinnamon generously on a toilet paper sheet.
Place the sheet near doorways, windows, or any pest-prone areas.
Replace the paper every few days for sustained effectiveness.
This eco-friendly solution protects your home while keeping harmful chemicals at bay.
Cinnamon for Personal Care
Surprisingly, cinnamon can also enhance personal hygiene routines. Its antimicrobial properties help reduce bacteria, making it a great addition to a quick clean-up solution.
DIY Refreshing Wipes
Sprinkle a pinch of cinnamon on toilet paper.
Dampen it slightly with water.
Use it as a refreshing wipe for hands or surfaces.
The result is a fragrant, germ-free experience that’s perfect for travel or emergencies.
Improving Sleep Quality
Did you know cinnamon can even promote better sleep? Placing a cinnamon-sprinkled sheet of toilet paper near your pillow releases a subtle aroma that helps calm the mind and body, encouraging deeper relaxation.
How to Use
Sprinkle a pinch of cinnamon on toilet paper.
Place the paper inside your pillowcase or near your headboard.
Enjoy a peaceful, aromatic sleep environment.
Crafting Unique Home Fragrances
If you love DIY projects, cinnamon can elevate your home fragrance game. Use the combination of cinnamon and toilet paper to create scent sachets or festive decorations.
Steps for Scent Sachets
Roll up a cinnamon-sprinkled toilet paper sheet into a small bundle.
Secure it with a ribbon or string.
Place the sachets in drawers, cars, or gift them during holidays.
This creates a warm and inviting atmosphere wherever you go.
Practical Tips for Using Cinnamon and Toilet Paper
Quality Matters: Use high-quality cinnamon for better results. Ceylon cinnamon, known as “true cinnamon,” is more effective than its counterpart, cassia.
Avoid Overuse: While cinnamon is safe, excessive amounts may irritate sensitive skin or respiratory conditions.
Store Properly: Keep your cinnamon in a cool, dry place to preserve its potency.
The Surprising Science Behind This Hack
Cinnamon contains compounds like cinnamaldehyde and eugenol, which are responsible for its antibacterial and antifungal properties. When released into the air, these compounds interact with bacteria and neutralize unpleasant odors and harmful microbes. This makes the combination of cinnamon and toilet paper not only practical but scientifically backed.
Why This Hack Is Gaining Popularity
The internet is brimming with ingenious life hacks, but this one stands out for being cost-effective, environmentally friendly, and versatile. Whether you’re looking for an odor eliminator, pest repellent, or personal care solution, sprinkling cinnamon on toilet paper proves its worth time and again.
Conclusion
Who knew that such a simple combination could provide such a wide range of benefits? From eliminating odors to repelling pests and enhancing personal care routines, sprinkling cinnamon on toilet paper is a game-changer. Try it out and discover how this easy hack can elevate your daily life.
Hydrangeas are beloved for their vibrant, showy blooms that can transform any garden into a picturesque haven. Yet, many gardeners face the frustration of sparse or lackluster flowers on their hydrangeas. Enter magnesium sulfate—a gardener’s secret weapon for healthier, more prolific blooms. This common compound, also known as Epsom salt, is a natural and effective way to boost hydrangea flowering. In this article, we’ll explore how magnesium sulfate works, how to use it properly, and why it’s a game-changer for hydrangea enthusiasts.
Understanding Magnesium Sulfate
The mineral component magnesium sulfate is made up of magnesium, sulfur, and oxygen. Its primary benefit for plants lies in its magnesium content, an essential nutrient for photosynthesis. Magnesium helps in the production of chlorophyll, which is critical for energy generation in plants. Sulfur, on the other hand, plays a vital role in synthesizing certain amino acids and proteins necessary for plant health.
When hydrangeas are deficient in magnesium, their growth can be stunted, and their blooms may lack vibrancy or fail to appear altogether. Magnesium sulfate can address these issues by enriching the soil and promoting healthier plant development.
Signs Your Hydrangeas Need Magnesium Sulfate
Before applying magnesium sulfate, it’s crucial to recognize the signs of magnesium deficiency in hydrangeas. Common symptoms include:
Yellowing Leaves: Older leaves may turn yellow while veins remain green, a condition known as interveinal chlorosis.
Poor Flowering: Fewer or smaller blooms than usual.
Weak Growth: Slower growth and less robust stems and foliage.
If your hydrangeas exhibit these signs, a magnesium sulfate treatment may be just what they need.
How Magnesium Sulfate Enhances Flowering
Magnesium sulfate enhances hydrangea flowering in several ways:
Improved Nutrient Uptake: Magnesium aids in the absorption of other essential nutrients, such as phosphorus, which is vital for flower production.
Enhanced Chlorophyll Production: By boosting chlorophyll levels, magnesium sulfate ensures that plants have the energy needed for vigorous growth and flowering.
Soil pH Adjustment: Although magnesium sulfate itself doesn’t significantly alter soil pH, it can improve nutrient availability in slightly acidic to neutral soils, which hydrangeas prefer.
Applying Magnesium Sulfate to Hydrangeas
Using magnesium sulfate for hydrangeas is straightforward, but proper application is key to reaping its benefits. Here’s how to do it:
1. Soil Test First
Before adding any fertilizer, conduct a soil test to check magnesium levels. Excess magnesium can harm plants and disrupt soil balance.
2. Mixing the Solution
For hydrangeas, dissolve 1 tablespoon of magnesium sulfate in 1 gallon of water. Stir until fully dissolved.
3. Applying to Soil
Pour the solution around the base of the hydrangea, focusing on the root zone. Avoid splashing the leaves, as direct contact can cause minor leaf burns.
4. Foliar Spray (Optional)
For a quick nutrient boost, use the same solution as a foliar spray. Apply it to the leaves early in the morning or late in the afternoon to avoid evaporation.
5. Frequency of Application
Use the magnesium sulfate solution once every four to six weeks during the growing season. Overuse can lead to nutrient imbalances, so moderation is crucial.
Complementary Practices for Better Results
While magnesium sulfate can significantly improve flowering, combining it with other good gardening practices will yield the best results:
Proper Watering: Hydrangeas thrive in consistently moist soil. Water often and thoroughly, especially when it’s dry.
Mulching: To control temperature and hold onto soil moisture, spread a layer of mulch around the base that is two to three inches thick.
Balanced Fertilization: In addition to magnesium sulfate, use a balanced fertilizer with nitrogen, phosphorus, and potassium to meet all nutrient needs.
Pruning: To promote new growth and enhance air circulation, trim any dead or weak stems.
Sunlight: Ensure your hydrangeas receive the right amount of sunlight—morning sun and afternoon shade work best for most varieties.
The Science Behind the Bloom Transformation
Scientific studies have shown that magnesium plays a pivotal role in improving flower production across various plant species. Hydrangeas, in particular, benefit from the improved photosynthesis and nutrient absorption facilitated by magnesium sulfate. Sulfur’s role in protein synthesis further supports robust plant growth, setting the stage for an abundance of blooms.
Final Thoughts
Magnesium sulfate is a simple yet powerful tool for boosting hydrangea health and flowering. By addressing magnesium deficiencies, this mineral compound ensures your hydrangeas are equipped to produce the vibrant blooms you desire. Remember to use it judiciously and pair it with proper gardening practices for the best results.
With a little effort and the right care, your hydrangeas can become the star attraction of your garden, rewarding you with their breathtaking beauty season after season. Give magnesium sulfate a try and watch your garden flourish like never before!
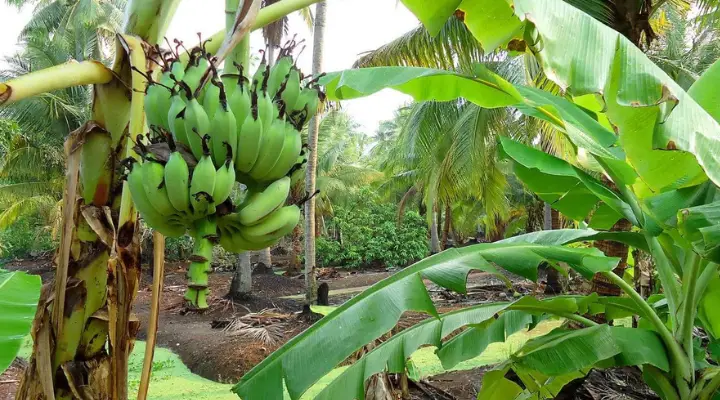
When you plant four bananas in your garden, the results might surprise you. Discover the secrets to nurturing these tropical fruits and achieving a bountiful harvest.
Preparing Your Garden for Banana Planting
Preparing the Soil for Optimal Growth
Before you start planting your bananas, it’s crucial to prepare the soil properly. Bananas thrive in well-draining soil with a pH level between 5.5 and 7.0. Guarantee the soil’s richness in organic matter by incorporating compost or aged manure. This will supply vital nutrients for robust growth.
Selecting the Perfect Location
Bananas require plenty of sunlight to flourish. Choose a location in your garden that receives at least six to eight hours of sunlight daily. Additionally, ensure the area is sheltered from strong winds, as bananas have shallow root systems that can easily be damaged.
Planting Your Banana Trees
Choosing the Right Varieties
When selecting banana varieties for your garden, consider your climate and available space. Some popular options include Cavendish, Dwarf Lady Finger, and Grand Nain. Choose a variety that is well-suited to your region and fits the size of your garden.
Planting Depth and Spacing
Excavate a hole that is double the width and equal in depth to the root ball of your banana plant. Gently remove the plant from its container and place it in the hole, ensuring the soil level matches that of the surrounding ground. Space your banana plants approximately 5 to 10 feet apart, depending on the variety.
Caring for Your Banana Plants
Watering
Bananas require consistent moisture to thrive. Ensure your plants receive regular watering, maintaining soil moisture consistently without becoming waterlogged. During hot, dry periods, increase watering frequency to prevent dehydration.
Fertilizing
Feed your banana plants with a balanced fertilizer every 2-3 months during the growing season. Look for a fertilizer specifically formulated for fruiting plants, and follow the manufacturer’s instructions for application rates.
Pruning
Regular pruning is essential to keep your banana plants healthy and productive. Remove any dead or damaged leaves, as well as any suckers that emerge around the base of the plant. This will help direct energy towards fruit production.
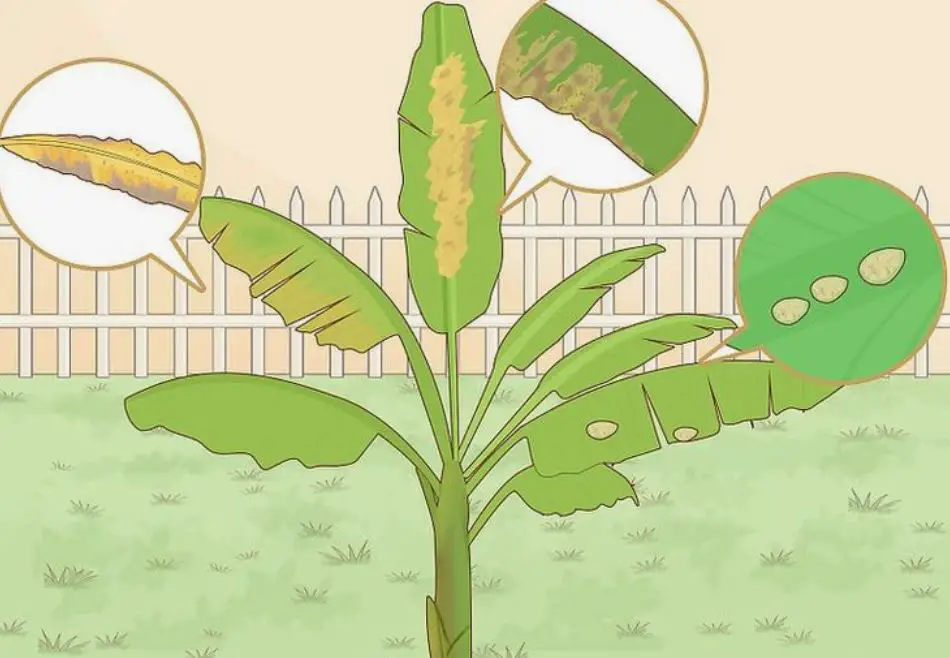
Protecting Against Pests and Diseases
Bananas are susceptible to a variety of pests and diseases, including nematodes, banana weevils, and fungal infections. Regularly inspect your plants for indications of infestation or disease, and promptly take necessary measures to address any emerging issues.Consider using organic pest control methods whenever possible to minimize the use of chemical pesticides.
Harvesting Your Bananas
Knowing When to Harvest
Bananas usually require 9-12 months to mature and bear fruit. Harvesting time varies depending on the variety and environmental conditions. Look for signs that indicate your bananas are ready to be picked, such as changes in color and firmness.
Harvesting Techniques
To harvest your bananas, use a sharp knife to cut the fruit from the plant, leaving a portion of the stem attached. Handle the bananas with care to avoid bruising or damaging the delicate skin.
Enjoying the Fruits of Your Labor
Once harvested, your bananas can be enjoyed fresh or used in a variety of recipes. From smoothies and desserts to savory dishes and baked goods, there are countless ways to incorporate bananas into your culinary creations.
In conclusion, growing bananas in your garden can be a rewarding experience with the right knowledge and care. By following these tips and techniques, you can cultivate healthy banana plants and enjoy a plentiful harvest of delicious fruit.
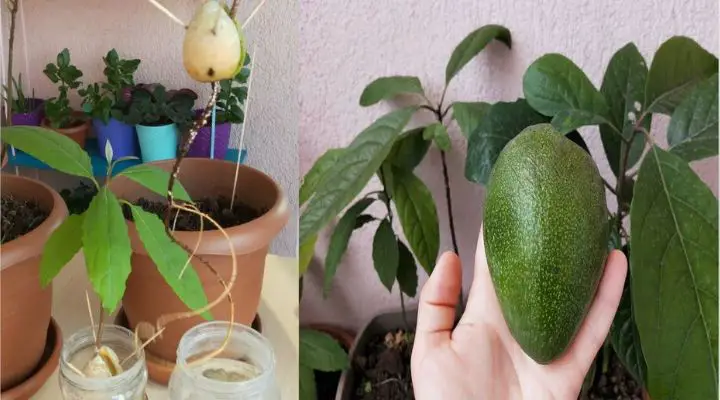
Growing an avocado in a pot at home is a rewarding experience. Not only do you get to enjoy fresh avocados, but you also have a beautiful plant to enhance your indoor space. This guide will take you through each stage of growing an avocado in a pot, from selecting the right variety to harvesting your delicious fruit.
Choosing the Right Avocado Variety
Why Variety Matters
Choosing the right avocado variety is crucial for successful growth. Some varieties are better suited to pot cultivation due to their smaller size and adaptability. The wrong variety might grow too large or require more space than a pot can provide.
Best Varieties for Pots
Some of the best avocado varieties for growing in pots include ‘Wurtz’, ‘Lamb Hass’, and ‘Little Cado’. These varieties are dwarf or semi-dwarf, making them ideal for container growth. They are more manageable and produce fruit that is just as tasty as their larger counterparts.
Preparing the Pot and Soil
Selecting the Right Pot
Choosing the right pot is essential for the health of your avocado plant. A pot with good drainage is crucial to prevent root rot. It should be at least 15-20 gallons in size to accommodate the growing roots. Materials like terracotta or plastic work well, but ensure there are enough drainage holes.
Ideal Soil Mix for Avocado Plants
Avocado plants thrive in well-draining soil. A mix of potting soil with sand or perlite ensures good drainage. Adding organic matter like compost can provide necessary nutrients. Avoid heavy soils that retain water, as they can cause root problems.
Planting the Avocado Seed or Seedling
Starting from Seed
Starting an avocado plant from a seed is a fun and educational process. Begin by removing the seed from a ripe avocado and cleaning it. Insert toothpicks into the seed and suspend it over a glass of water, with the bottom submerged. Place it in a warm, sunny spot and wait for it to sprout roots and a stem. This can take several weeks.
Transplanting a Seedling
If you prefer a quicker start, purchasing a young avocado seedling from a nursery is a great option. Transplant the seedling into your prepared pot, making sure to keep the root ball intact. Saturate the soil thoroughly and position it in a location awash with sunlight. Seedlings establish faster and can bear fruit sooner than those started from seed.
Caring for Your Potted Avocado Plant
Watering Requirements
Avocado plants need consistent watering but should not sit in waterlogged soil. When the top inch of soil seems dry, water it. While underwatering might result in foliage wilting, overwatering can cause root rot. Use a pot with drainage holes to help regulate moisture levels.
Sunlight and Temperature
Avocado plants love sunlight. Place your pot in a location where it receives at least 6-8 hours of direct sunlight daily. During colder months, ensure the plant is protected from frost by bringing it indoors or using a plant cover. Ideal temperatures range from 60-85°F.
Fertilizing and Pruning
When and How to Fertilize
Fertilizing your avocado plant helps promote healthy growth and fruit production. Every two to three months, apply a balanced, slow-release fertilizer. Alternatively, organic options like fish emulsion or compost tea can be applied more frequently. Be cautious not to over-fertilize, as this can damage the plant.
Pruning Tips for Healthy Growth
Your avocado plant’s size and form may be preserved via pruning. Remove dead or damaged branches and any growth that appears unhealthy. Prune in the spring or early summer to encourage new growth. Regular pruning ensures good air circulation and prevents diseases.
Dealing with Common Problems
Pests and Diseases
Avocado plants in pots can be susceptible to pests like spider mites, aphids, and scale insects. Regularly inspect your plant and use insecticidal soap or neem oil to treat infestations. Diseases like root rot can be avoided by ensuring proper drainage and not overwatering.
Yellowing Leaves and Other Issues
The presence of yellowing leaves may signify a range of problems, such as excessive watering, lack of nutrients, or infestation by pests. Check your watering schedule, inspect for pests, and consider a soil test to determine if additional nutrients are needed. Addressing these issues promptly will help keep your plant healthy.
Harvesting Your Avocados
Knowing When to Harvest
Avocados do not ripen on the tree. Once they reach maturity, you can pick them and let them ripen indoors. Mature avocados are typically darker in color and slightly soft to the touch. It can take several days to a week for them to ripen after picking.
Proper Harvesting Techniques
To harvest your avocados, use a sharp knife or pruning shears to cut the fruit from the tree, leaving a small stem attached. Handle the fruit gently to avoid bruising. Store them at room temperature until they soften. Once ripe, you can enjoy your home-grown avocados in various dishes.
By following these stages, you can successfully grow an avocado in a pot at home. Relish the journey and savor the rewards of your hard work!
Gardening is more than just a hobby; it’s a rewarding activity that brings you closer to nature and provides numerous benefits. Whether you’re growing flowers, vegetables, or herbs, there’s something incredibly satisfying about watching your plants thrive. But how do you ensure your garden flourishes? Let’s dive into seven amazing ways and tricks to grow plants successfully.
1. Choose the Right Plants for Your Climate
Understanding Your Hardiness Zone
Before you start planting, it’s crucial to know your hardiness zone. This zone indicates the climatic conditions of your area and helps you select plants that will thrive in your region. Check the USDA Hardiness Zone Map to determine your zone and choose plants accordingly.
Selecting Native Plants
Native plants are adapted to your local environment, making them easier to grow and maintain. They require less water, are more resistant to pests, and support local wildlife. Visit your local nursery or extension office to find out which native plants are suitable for your garden.
2. Prepare the Soil Properly
Soil Testing
Good soil is the cornerstone of a successful garden. Conduct a soil test to understand its composition and pH levels. This information will guide you in amending your soil to provide the best environment for your plants.
Adding Organic Matter
Incorporating organic matter like compost, manure, or leaf mold can significantly improve soil structure, fertility, and drainage. It also promotes beneficial microbial activity, which is essential for plant health.
Ensuring Proper Drainage
Poor drainage can lead to root rot and other plant diseases. If your soil is heavy and clay-like, consider adding sand or perlite to improve its drainage capabilities. Raised beds are another excellent solution for areas with poor drainage.
3. Watering Techniques
The Importance of Consistent Watering
Plants need consistent moisture to grow well. Too little water can stress plants, while too much can suffocate their roots. Establish a regular watering schedule that suits the needs of your plants and climate.
Watering Methods: Drip Irrigation, Soaker Hoses, and Hand Watering
Drip irrigation and soaker hoses are efficient watering methods that deliver water directly to the plant roots, reducing evaporation and runoff. Hand watering is also effective, especially for small gardens or potted plants. To promote deep root development, make sure you water well.
Best Times to Water Your Plants
Watering in the early morning or late afternoon is ideal as it reduces water loss due to evaporation and allows plants to absorb moisture before the heat of the day. Watering in the evening should be avoided as it might encourage fungus illnesses.
4. Use Mulch to Your Advantage
Types of Mulch
Mulch can be organic, like wood chips, straw, or grass clippings, or inorganic, like gravel or landscape fabric. Each type has its benefits and can be chosen based on your specific needs.
Benefits of Mulching
Mulch helps retain soil moisture, suppress weeds, regulate soil temperature, and add organic matter to the soil as it decomposes. It’s a simple yet effective way to improve your garden’s health.
How to Apply Mulch Correctly
Apply a 2-3 inch layer of mulch around your plants, ensuring you don’t pile it against the plant stems, which can cause rot. Replenish mulch as needed to maintain its effectiveness.
5. Prune Regularly
Why Pruning is Essential
Pruning promotes healthy growth, improves air circulation, and prevents diseases. It also helps shape the plants and encourages more blooms or fruit production.
Pruning Techniques for Different Plants
Different plants require different pruning techniques. For example, roses benefit from deadheading, while fruit trees need thinning cuts. Research the specific needs of your plants to prune them correctly.
Best Times to Prune
The best time to prune varies by plant species. Generally, prune flowering shrubs after they bloom, and prune deciduous trees and shrubs in late winter or early spring before new growth starts.
6. Combat Pests Naturally
Identifying Common Garden Pests
Aphids, slugs, and caterpillars are just a few common garden pests. Regularly inspect your plants for signs of pest damage, such as chewed leaves, discolored spots, or stunted growth.
Natural Pest Control Methods
Use natural pest control methods like neem oil, insecticidal soap, or diatomaceous earth to protect your plants. Introducing beneficial insects, like ladybugs and predatory nematodes, can also help control pest populations.
Companion Planting for Pest Control
Growing certain plants next to one other to ward against pests is known as companion planting. For example, marigolds can repel nematodes, while basil can ward off aphids. This method is a natural and effective way to protect your garden.
7. Utilize Composting
Benefits of Composting
Composting converts kitchen scraps and yard waste into nutrient-rich compost, which can improve soil fertility and structure. It’s an eco-friendly way to recycle organic waste and reduce landfill contributions.
How to Start a Compost Pile
Start by choosing a compost bin or creating a designated area in your yard. Combine green materials (like fruit scraps and grass clippings) with brown materials (like leaves and cardboard) in a 1:3 ratio. To promote faster decomposition and aeration, turn the pile frequently.
Using Compost in Your Garden
Utilize your compost to improve the soil in your garden once it’s ready. Apply it as a top dressing, mix it into planting beds, or use it to make compost tea. Your plants will benefit from the added nutrients and improved soil structure.
Conclusion
Gardening is a delightful and fulfilling activity that anyone can enjoy. By choosing the right plants, preparing the soil, watering correctly, using mulch, pruning, combating pests naturally, and utilizing composting, you can create a thriving garden. So, grab your gardening gloves and start growing!
FAQs
How often should I water my garden?
The kind of soil, plant requirements, and climate all affect how often you water. Generally, aim to water deeply once or twice a week, allowing the soil to dry slightly between watering.
What are the best plants for beginners?
Some easy-to-grow plants for beginners include tomatoes, lettuce, radishes, marigolds, and herbs like basil and mint.
How can I improve my soil quality?
Improving soil quality involves adding organic matter like compost, maintaining proper pH levels, and ensuring good drainage. Regular soil testing can help you make necessary adjustments.
What are some natural ways to get rid of garden pests?
Natural pest control methods include using neem oil, insecticidal soap, introducing beneficial insects, and practicing companion planting.
How do I know when to harvest my plants?
Harvesting times vary by plant. Generally, vegetables are ready when they reach their mature size and color. Herbs can be harvested as needed, and fruits are typically ripe when they are firm and have full color.
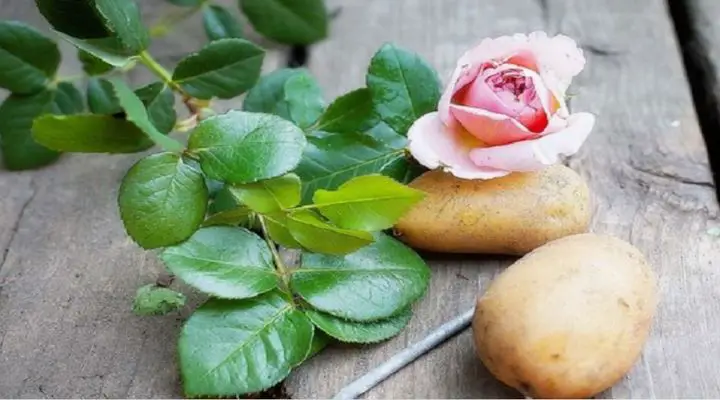
Growing roses can seem like a daunting task, but with a few tricks up your sleeve, you can cultivate beautiful blooms without much hassle. One such trick is propagating rose cuttings in a potato. Yes, you heard that right! This unique method has been gaining popularity among laidback gardeners for its simplicity and effectiveness.
Why Propagate Roses with Potatoes?
You might wonder, why use potatoes to propagate roses? The potato method offers several benefits that make it worth trying. Potatoes provide a moist and nutrient-rich environment, which is perfect for encouraging root growth. This technique is not only fun but also highly effective, especially for novice gardeners looking to expand their rose collection.
Materials Needed
Before diving into the process, gather the necessary materials:
Healthy rose cuttings
Medium-sized potatoes
Sharp knife
Hormone rooting powder
Potting soil
Plant pots or garden bed
Watering can
Optional materials that can improve success include a plastic bag or a mini greenhouse to maintain humidity.
Selecting the Right Rose Cuttings
The first step is to select the right rose cuttings. The best time to take cuttings is during late spring or early summer when the roses are actively growing. Choose healthy stems that are about 6-8 inches long, with at least three leaf nodes and a few leaves at the top.
Preparing the Rose Cuttings
Once you have your cuttings, it’s time to prepare them:
Trim the cutting just below a leaf node.
Remove the bottom leaves, leaving only a couple at the top.
Dip the cut end in hormone rooting powder to encourage root development.
Choosing the Right Potatoes
Not all potatoes are created equal for this purpose. Medium-sized potatoes with firm flesh work best. Avoid using potatoes that are too small or too large, as they may not provide the ideal environment for the cuttings.
Preparing the Potatoes
Prepare your potatoes by cutting them in half if they are too large. Make a hole in each potato half that is just large enough to insert the rose cutting. Ensure the hole is deep enough to support the cutting without it wobbling.
Inserting the Cuttings into Potatoes
Carefully insert the prepared rose cuttings into the holes in the potatoes. Make sure the cuttings are secure and standing upright. The potato will help keep the cutting moist and provide some nutrients as it begins to root.
Planting the Potato-Cutting Combo
Now that your cuttings are securely in the potatoes, it’s time to plant them. Choose a well-draining soil mix and plant the potato-cutting combo about 4-6 inches deep. Ensure the cuttings are buried enough to support them, but not so deep that they are completely covered.
Watering and Care
Water the newly planted cuttings thoroughly. Keep the soil consistently moist but not waterlogged. Place the pots or garden bed in a location with indirect sunlight. Maintaining the right balance of light and moisture is crucial for successful rooting.
Monitoring Growth
Over the next few weeks, monitor the cuttings for signs of growth. New leaves and shoots indicate successful rooting. If the cuttings appear wilted or show no signs of growth after a few weeks, they may not have taken root. Patience is key, as rooting can take anywhere from 2-4 weeks.
Transplanting to Permanent Location
Once the cuttings have developed a good root system, it’s time to transplant them to their permanent location. Choose a spot in your garden with well-draining soil and adequate sunlight. Carefully dig up the cuttings, ensuring you don’t damage the roots, and transplant them into their new home.
Caring for Newly Transplanted Roses
After transplanting, water the roses thoroughly and keep the soil consistently moist for the first few weeks. Fertilize with a balanced rose fertilizer to encourage healthy growth. Protect the new plants from pests and diseases by keeping an eye out for any signs of trouble.
Advantages of Using Potatoes for Rose Cuttings
Using potatoes for rose cuttings has several advantages. Potatoes help retain moisture around the cutting, reducing the risk of drying out. They also provide a source of nutrients that can boost the rooting process. This method is particularly useful in dry climates or for gardeners who struggle with maintaining consistent moisture levels.
Common Mistakes to Avoid
While the potato method is relatively simple, there are common mistakes to avoid:
Overwatering or underwatering: Finding the right balance of moisture is crucial.
Using the wrong type of soil or potato: Ensure you use well-draining soil and medium-sized, firm potatoes.
Improper cutting preparation: Always use healthy cuttings and apply rooting hormone to increase success rates.
Conclusion
Propagating roses in potatoes is a fun and effective way to grow new plants. This method leverages the natural moisture and nutrients of potatoes to create an ideal environment for root development. Whether you’re a novice or an experienced gardener, this laidback approach can yield beautiful results. So why not give it a try and expand your rose garden with minimal effort?
FAQs
Can I use any type of potato for rose cuttings? While most potatoes can work, medium-sized, firm potatoes are ideal. Avoid using overly small or large potatoes.
How long does it take for rose cuttings to root in potatoes? It typically takes 2-4 weeks for rose cuttings to root in potatoes, depending on the conditions.
Do I need to use rooting hormone? Using rooting hormone is recommended as it increases the chances of successful rooting, but it’s not absolutely necessary.
Can I grow other plants with this method? Yes, this method can be used for other types of plant cuttings that require similar rooting conditions.
What should I do if my cuttings don’t root? If your cuttings don’t root, review the steps to ensure you followed them correctly. Try adjusting the moisture levels or light conditions and attempt the process again.